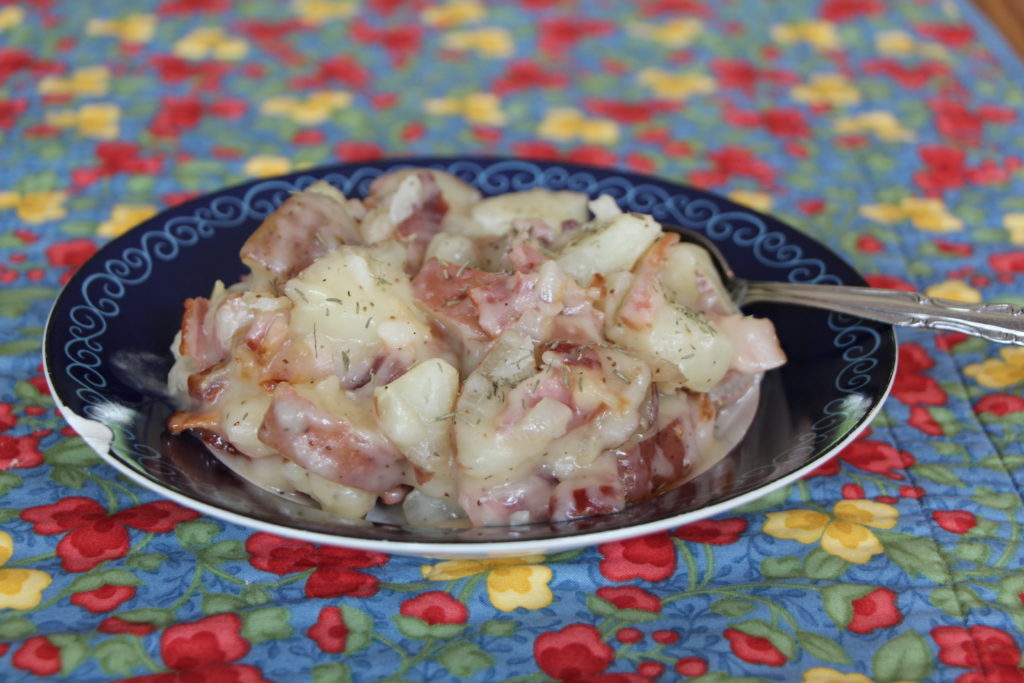
 Can she really write a whole blog about potato salad, and what is so special about german potato salad and what is it you may ask? Well, let’s talk about this beloved special side dish. In our family, that is the Clem and Mathilda(Tillie) Kuennen family I have been eating this at our get-togethers as long as I can remember. You know how it goes, Aunt Donna brings the home-made sausage, Aunt Lori brings the corn and Aunt Geneva brings the german potato salad. Well what happens when these aunts and uncles grow old, become ill or sometimes pass away, someone needs to carry on the tradition and continue to bring these dishes. It’s like passing on our family traditions, just through food. At our gathering last summer in St. Lucas, two of us cousins brought the german potato salad, both are very good and I think we both knew the importance of passing down these recipes in the Kuennen family. So let me tell you more about the recipe.
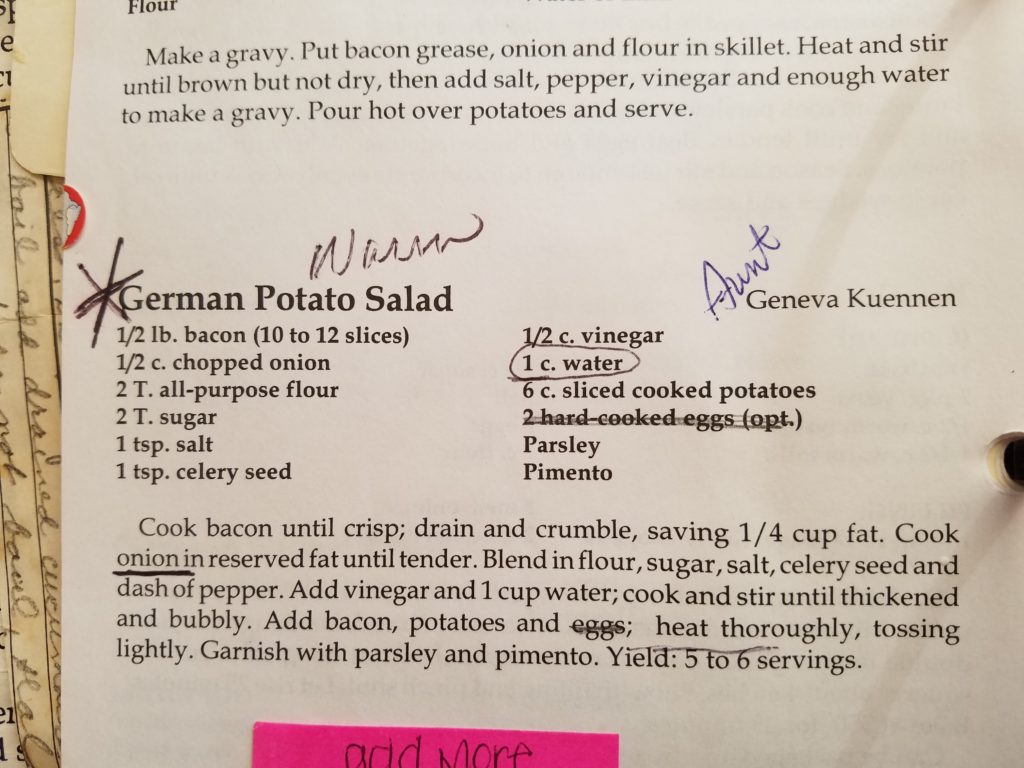 This “salad” is served warm and it has a sweet and sour taste to it, I feel like it’s one of those foods if you grew up with it you love it, and if you were brought into the family you love it or you don’t. As you can see there is an interesting list of ingredients, you can add others or omit some of these, I do not add the eggs, parsley or pimento. Also I don’t really measure, I just cook up a pan of potatoes, fry a pound of bacon( yes, lots of bacon is good!) and the rest is by taste and consistency. First I boil the potatoes cutting them all about the same size..
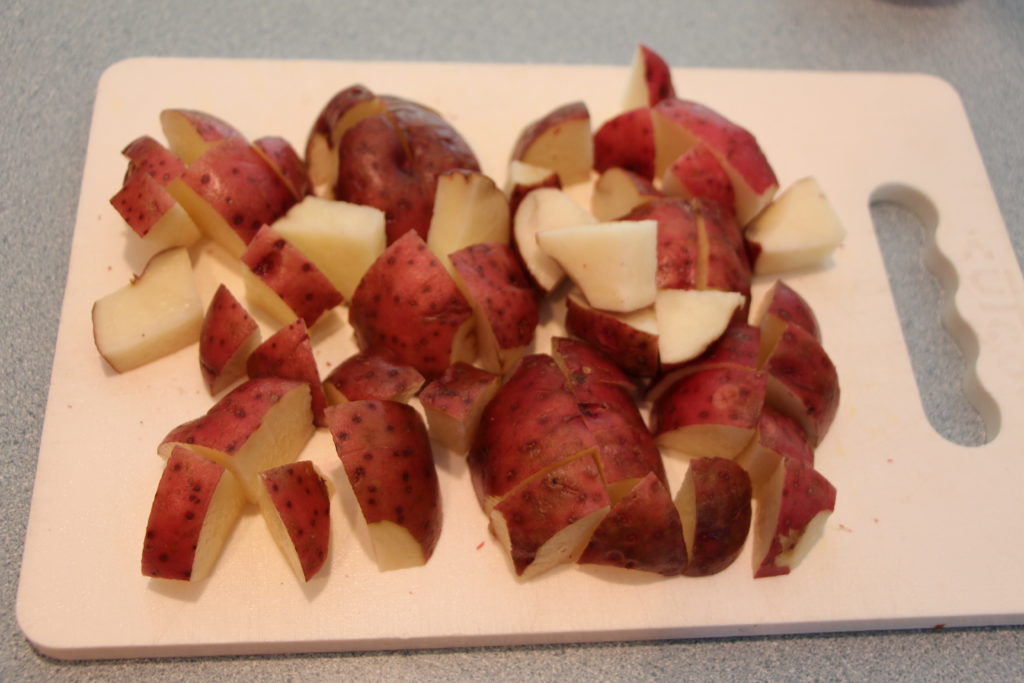 Red skinned potatoes add color to the salad and hold their shape, be sure to undercook them a bit, or you will have mashed potato german salad. While the potatoes are cooking, I cut up the bacon and fry it until it is fairly crisp, this helps to render off some of the fat but I don’t fry it to the point where it is crunchy.
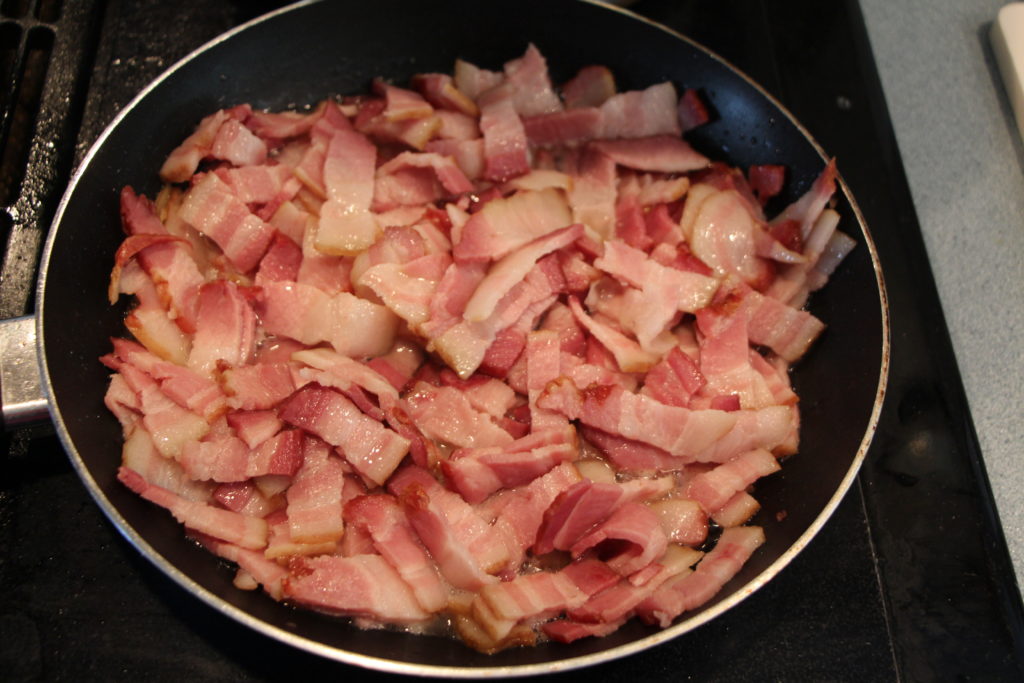 I Chop the onions, set out a heavy pot and my other ingredients and by this time the potatoes are done cooking, give them a quick drain and leave them set, lid off(so they don’t continue to cook). The bacon will be done, so place this on some paper towels and add some of the fat to the heavy pot, add the onions and fry until soft.
 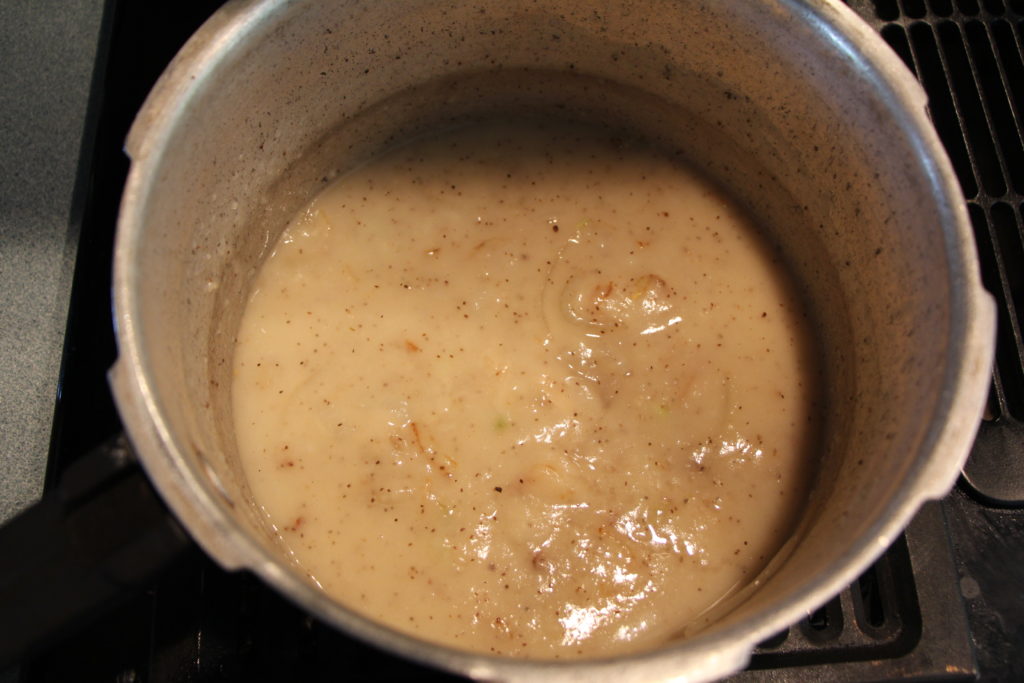 The next step is like making a roux, or a thickening sauce. I whisk the flour into the fat and then quickly add the water and vinegar, because if you are to slow you know what happens, lumps and we don’t want that. Next add in your seasonings and sugar and taste, is it too sour, add sugar and cook until it’s fairly thick. Also is it too thin then add more flour, or is it too thick, then add water. The photo above is what mine looks like. This next part is the best, you mix the sauce, potatoes and bacon together, I usually use the large pot I cooked the potatoes in to mix this all together. You can check the taste again at this point and see if it needs anything else.
 Here is the finished salad! This can easily be made the day before and just warmed up, I do this often, it also works well to bring to an event in a crock pot. I am sure your family has favorite food traditions as well, share them with me and my readers. Have a Great Day!
Author Archives: Carla
Where’s The Quilts?
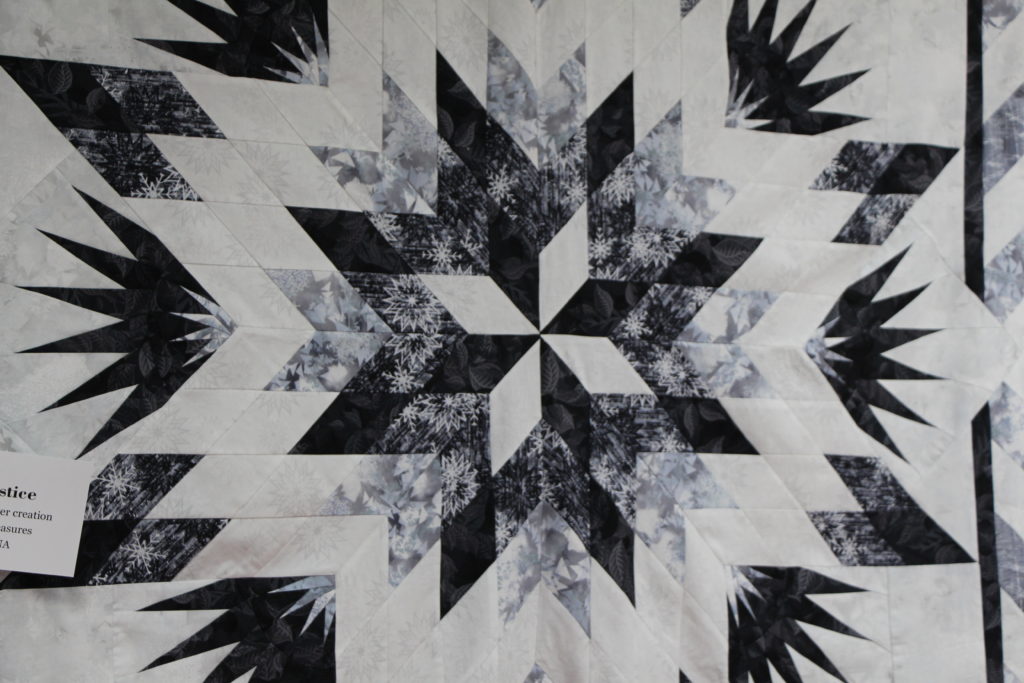
Yes! Where are they? The last time I posted a quilt photo or wrote about one was on May 25th. Well let me explain, you see I have been gone, sitting on a beach in a tropical paradise, literally doing nothing, sleeping, getting massages, having food and drinks catered to me, and someone waiting on me 27/7. Heck No! Thats not me! You see I am not a sitting type of person, except for sitting at a sewing machine and a few other activities, it is just engrained in me that a person just needs to be working at something all the time. I am ok with that as I am happy to always have a “list” and even more important that physically and mentally, I am able to work, always be thankful for your health.
Here are some of my projects in the works.
First off is Lindsay’s beautiful bridal gown that I have been working on, I mentioned her in my birthday blog last week. Her dress needed a few minor, but time consuming alterations that required multiple visits from Lindsay for fitting. The gown is complete and back in her hands and I will tell you all about it after the June wedding. Our family of friends are super excited for the wedding as they are the first of the kids to get married! In addition to altering the bride’s dress, I also helped out the Grandmother of the groom and currently have 3 other bridesmaids dresses as well to alter.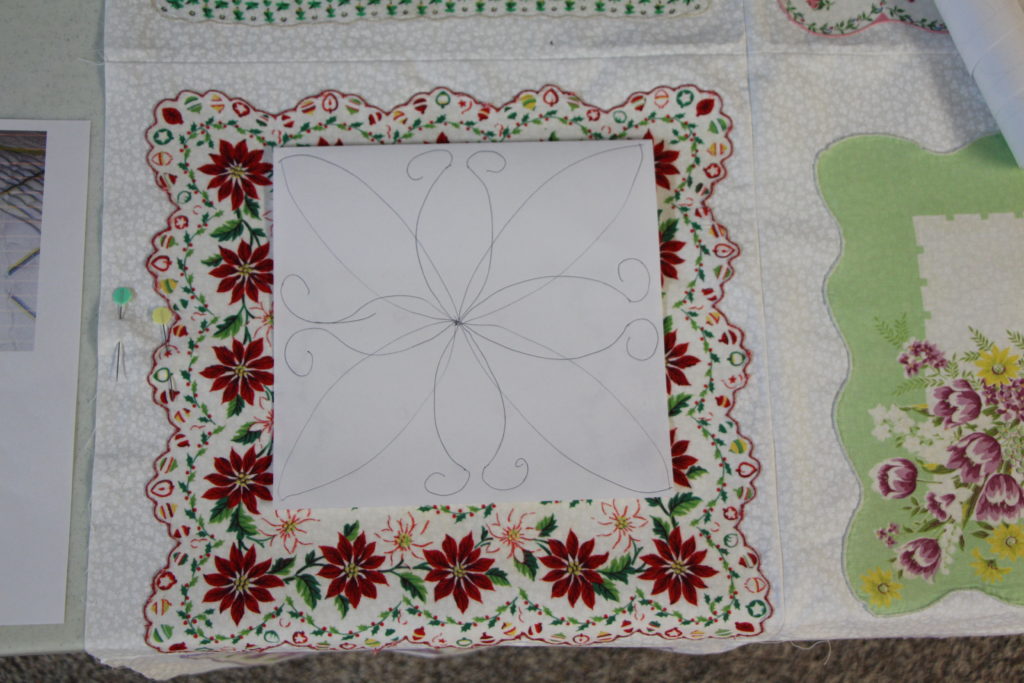
The handkerchief quilt from Carrie, I have been working on a quilting design for and would like to try a new custom design for this. I think a leaf or petal design in the blocks would add to the overall design and Carrie agreed. I have visited a local company that does glass repair and they have also made me custom acrylic quilting templates for me in the past. The templates are done and I will be receiving them soon. I am looking forward to incorporating them into this for this wedding gift, so I will show you the results later.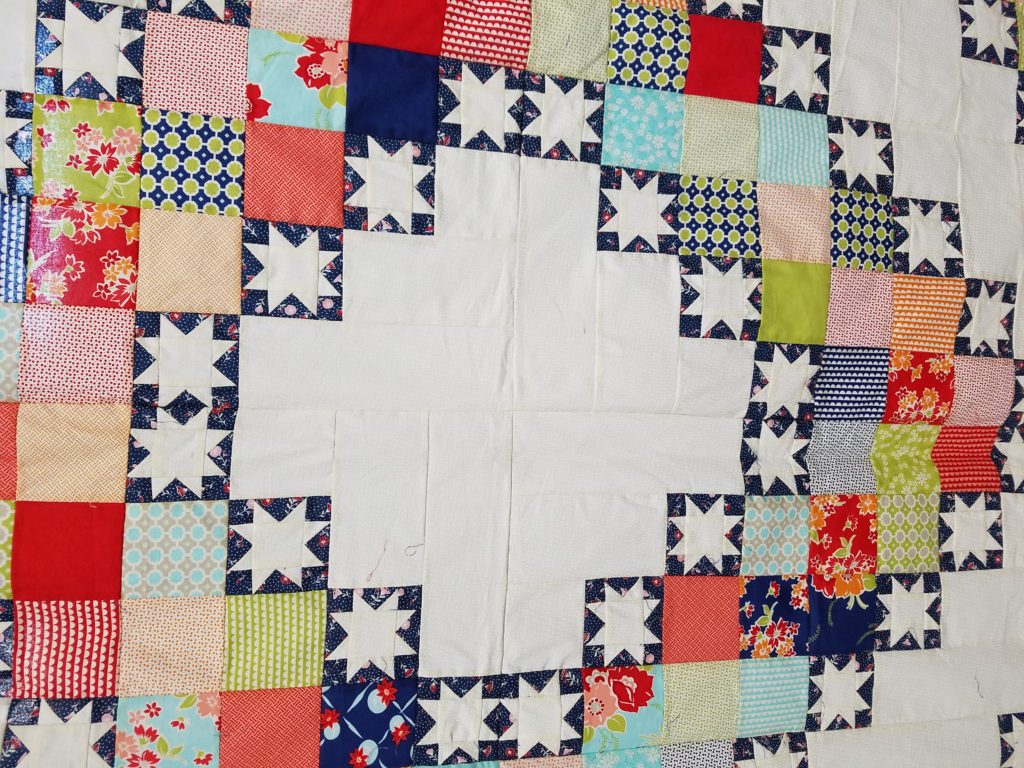
I also have a quilt from Jo, you can read about it here, and I have pretty good idea of how I will quilt it. I am going to use double batting to emphasize the longarm quilting, once again, designing, researching and ordering supplies all take time. On the list next is Barbara’s wedding quilt, a store sample quilt from Red Roxy quilt shop in Decorah, Iowa(the top photo), Melissa has 2 quilt for me and Jenny has 2 quilts to be done as well! Noelle is home from Germany and wants to finish her quilt also. It is good to have a list, right? Oh, and I helped Gene Anne make a graduation gift for someone too, can’t tell you about it yet as it is a gift too. Well, enough chit chat here, I need to quilt!
It’s my Birthday!
My birthday will be this Memorial Day weekend and we will be gathering again with our group of friends. Last year was a “milestone” birthday and I celebrated with our friends choosing some of my favorite activities and places to go and they were all able to make it! Let me show you what Dawn, Kim, Myself and Barb did.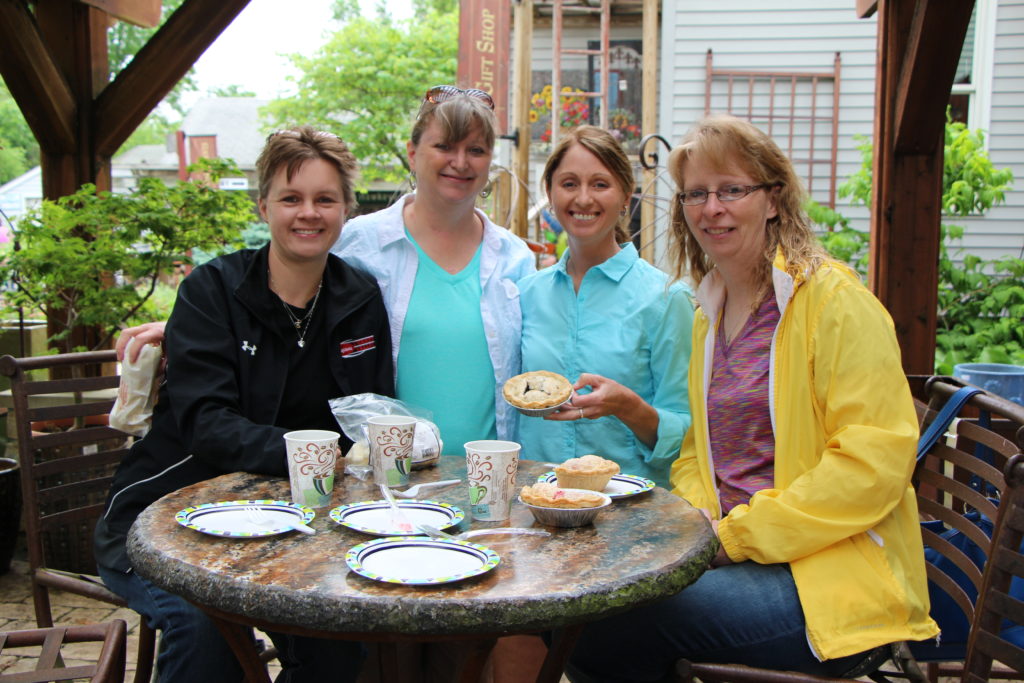 Our first stop was at K & K Gardens in Hawkeye, Iowa, and look, we had pie for breakfast! Since 1996, Keith and his family have been offering Northeast Iowa the largest selection of new and unusual perennials, annuals, woody ornamentals, water garden plants, water garden equipment, accessories, garden gifts, tools, and an incredible selection of hosta. They are listed as Iowa’s #1 destination garden center. It has the selection of a commercialized center, but it’s not like that. It has a home like feel to it and if Keith does not have what you are looking for, he will order it in. Sometimes on the weekends the Mennonite ladies that work there bring in pie to sell, it is delicious. Here are a few more fun photos from there.
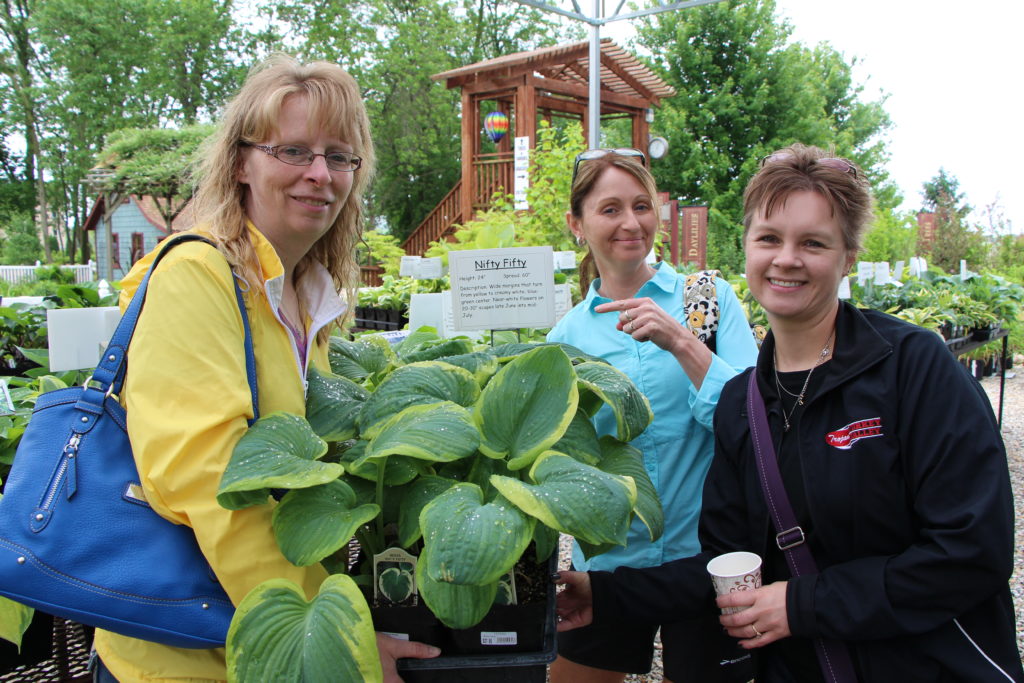
 The tag gives a hint of how old I was, I bought this one!
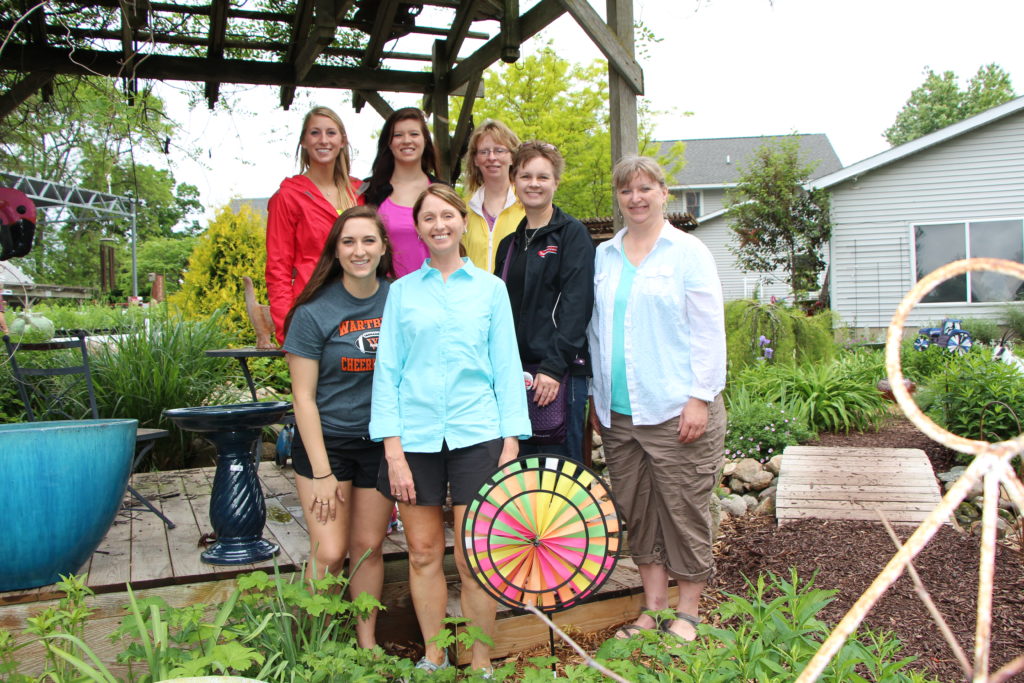
 Here we are in a beautiful landscaped area, our friend group, Noelle, Victoria and our “like a daughter” to us Lindsey.
Malanaphy Springs in Decorah, Iowa was our next stop, you can find out more information about this beautiful site in a blog I did last week. Here are a few photos from last year when we went. Here is Victoria, Noelle and I at the springs.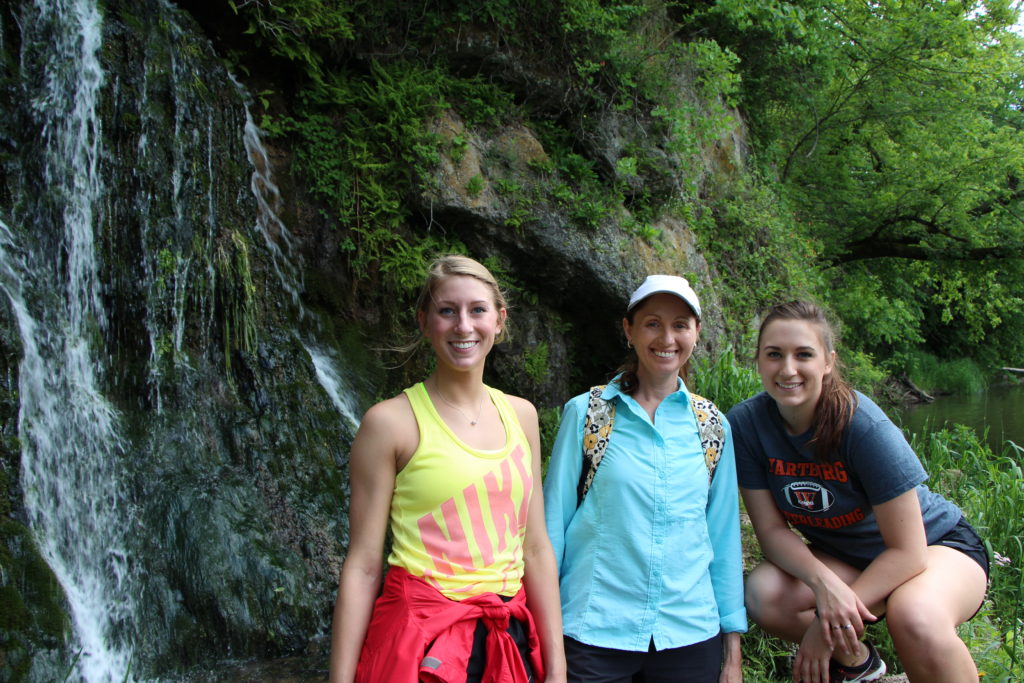 Dawn and Noelle can’t believe what they see!
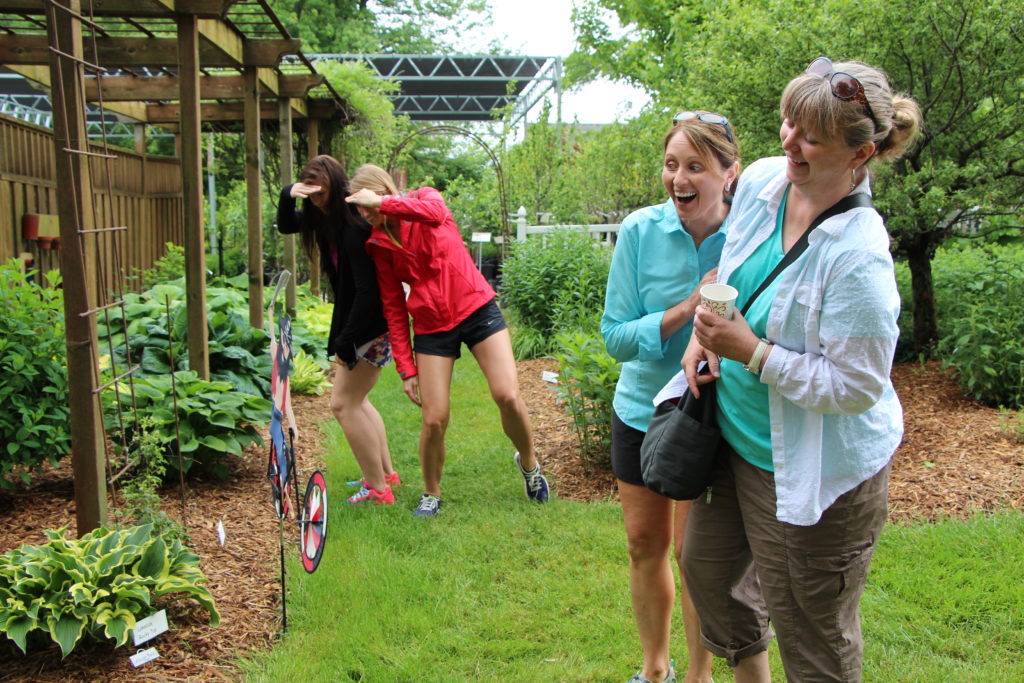
 Barb is trying to move the tree out of the path for me, Kim is serving as backup!
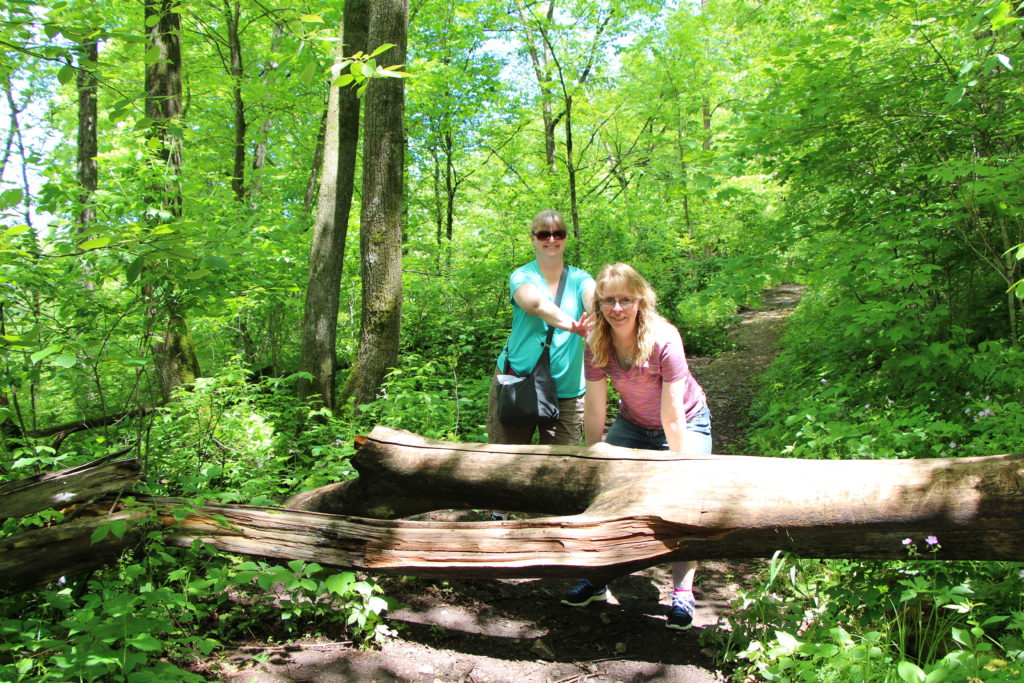
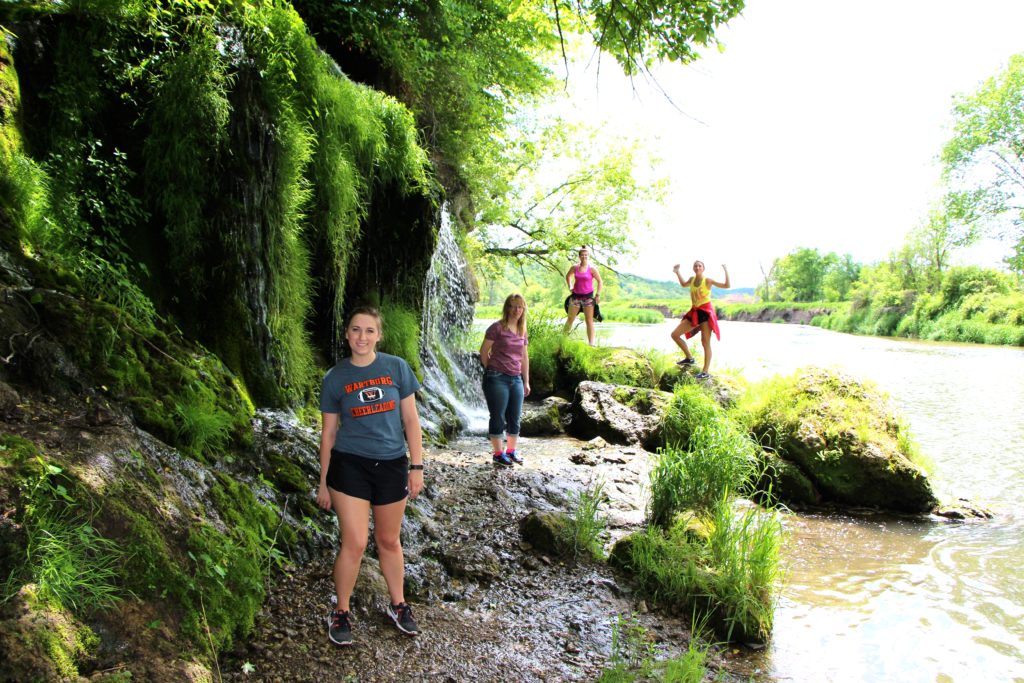 As you can tell, we try to have lots of laughs and fun!
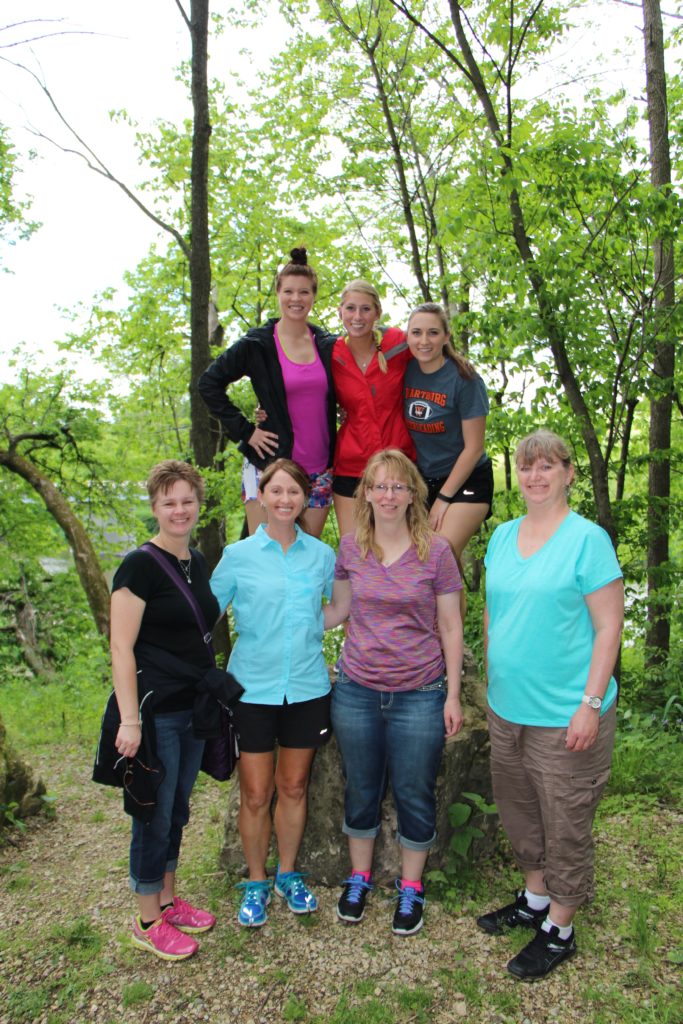 We had a few more stops throughout the day, but the final one was at Winneshiek Wildberry Winery,, us girls like a little wine here and there and I had not been here, so it was on the list to stop.
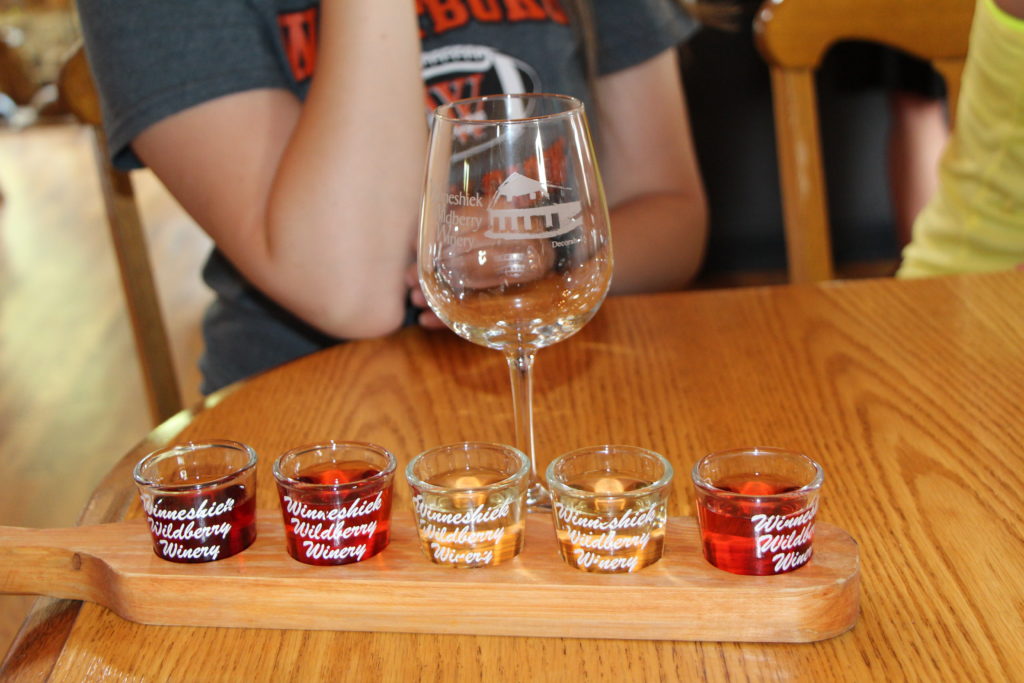 This winery tends to specialize in dry wines which I do not prefer, so we did way more talking than drinking here!
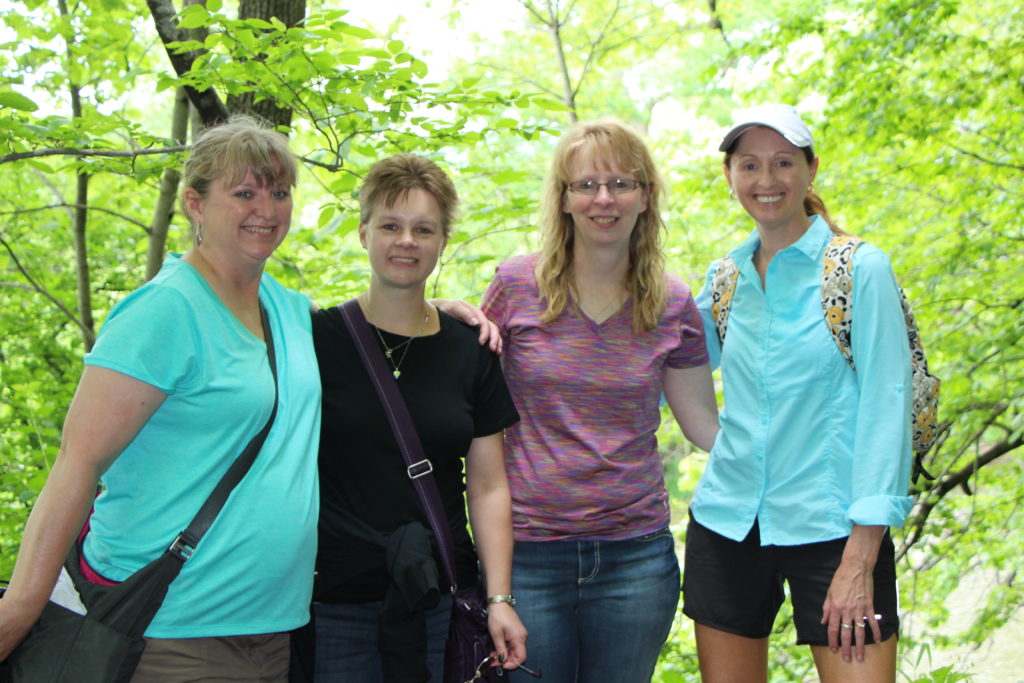
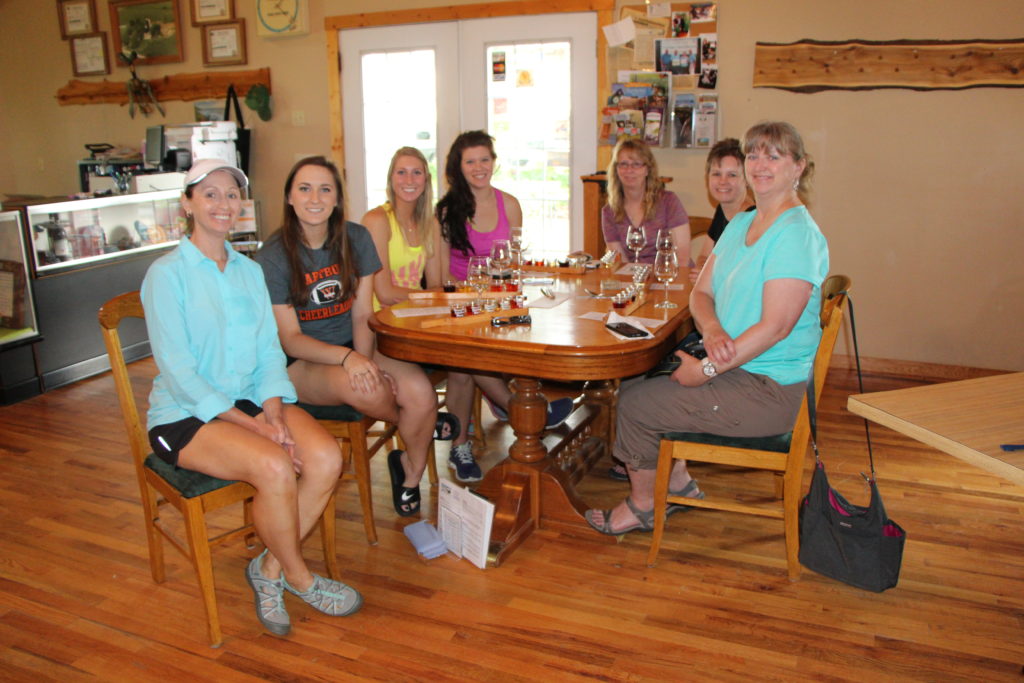 It sure was a great day, yes we went to some of my favorite places, but I think you would agree with me, what matters is who you are with. I hope you are as lucky as I to have a wonderful group of friends you can count on.
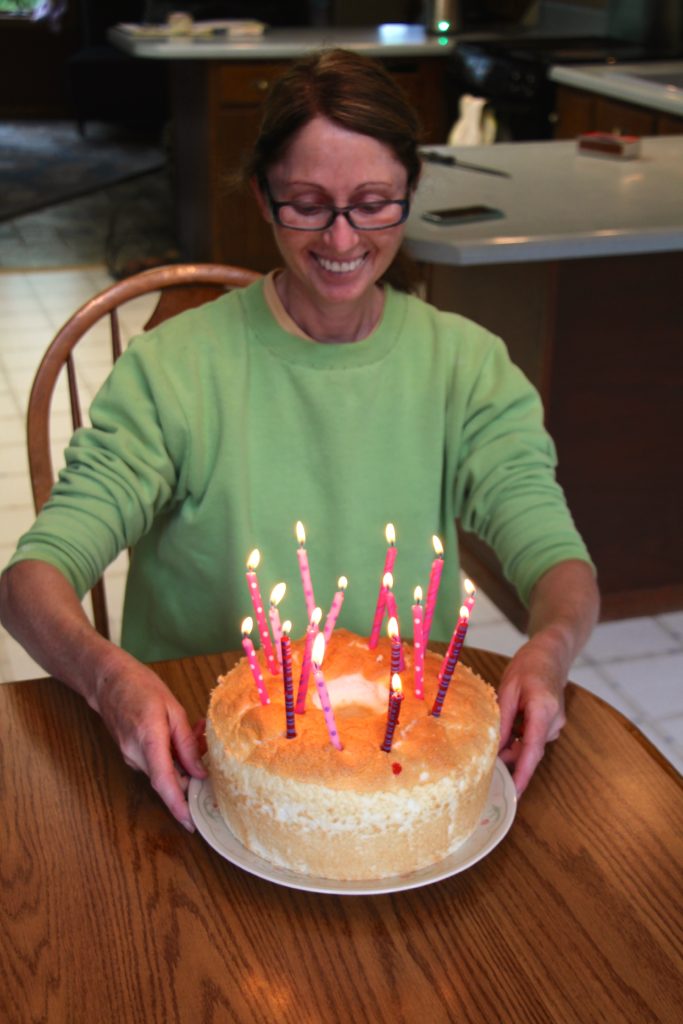
 Oh, and one last photo, It’s me with my birthday cake Noelle made, white angle food, and yes you will see a future blog post on angle food cakes. Have a wonderful weekend:)
Quilt Batting
Recently on a quilt site I follow there were several hundred comments regarding a photo a member had posted about “bearding” on the back of her quilt when she picked it up from the longarm quilter. I was amazed at how many people did not know about this, nor did they realize there is usually a right and wrong side to batting. I am not sure when I learned this as it is one of those things you feel like you have always known this. We will talk about that in a bit, first off here is a sample photo of what us quilters call bearding on the back of a quilt.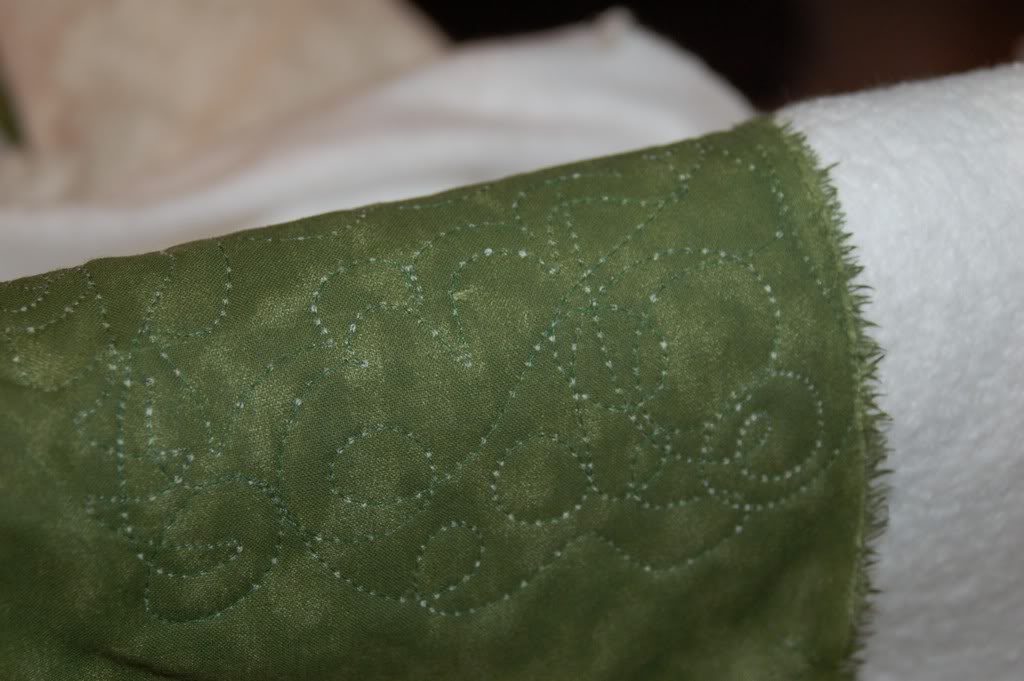 This is the best example I could find in the online images. As you can see, at every stitch there is a white tuft of batting coming through the backing, for several reasons some known and some unknown this happens as the needle goes through the quilt and it takes some of the batting with it and leaves it on the outside of the backing, it is a unpleasing look that we do not like to see. In addition there really is not much we can do after the fact, some will say was it, snip them off, wash and dry the quilt, it will go away with time, my best solution is, prevent this from happening and these suggestions will help.
First, know your batting. My go to batting is quilters dream. It is 70% cotton and 30% polyester, it is versatile, high quality and the company located in Virgina Beach is great to work with. I buy my batting on large rolls which always come well sealed and are rolled without creases or seams. Here a is a few photos.
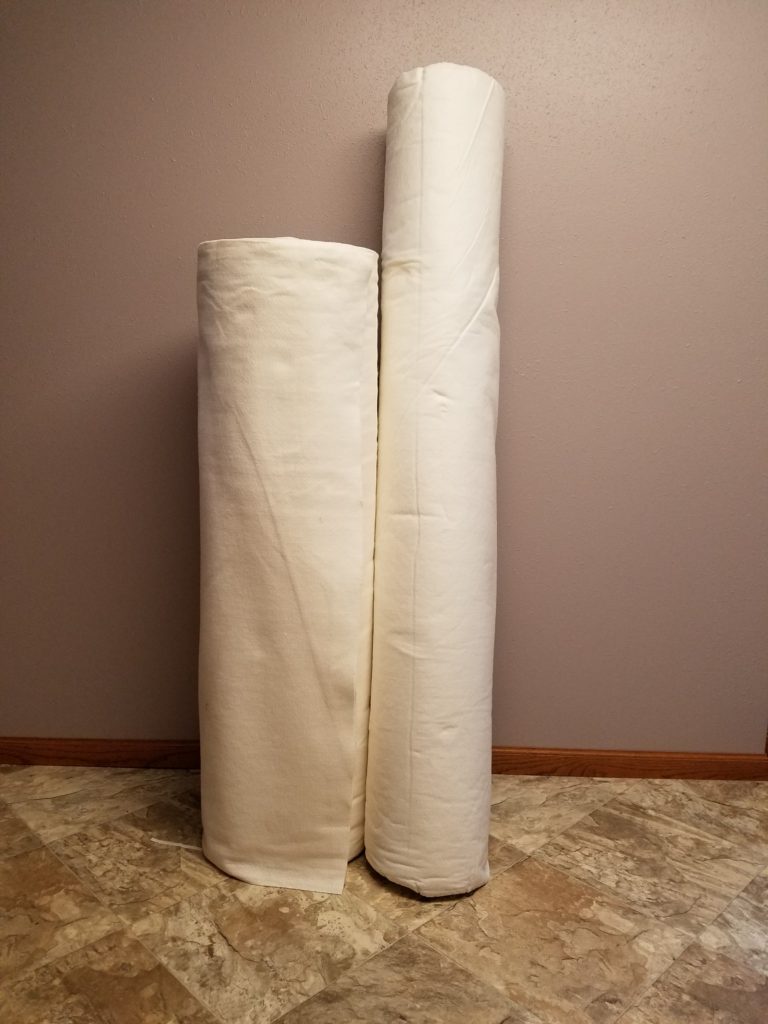
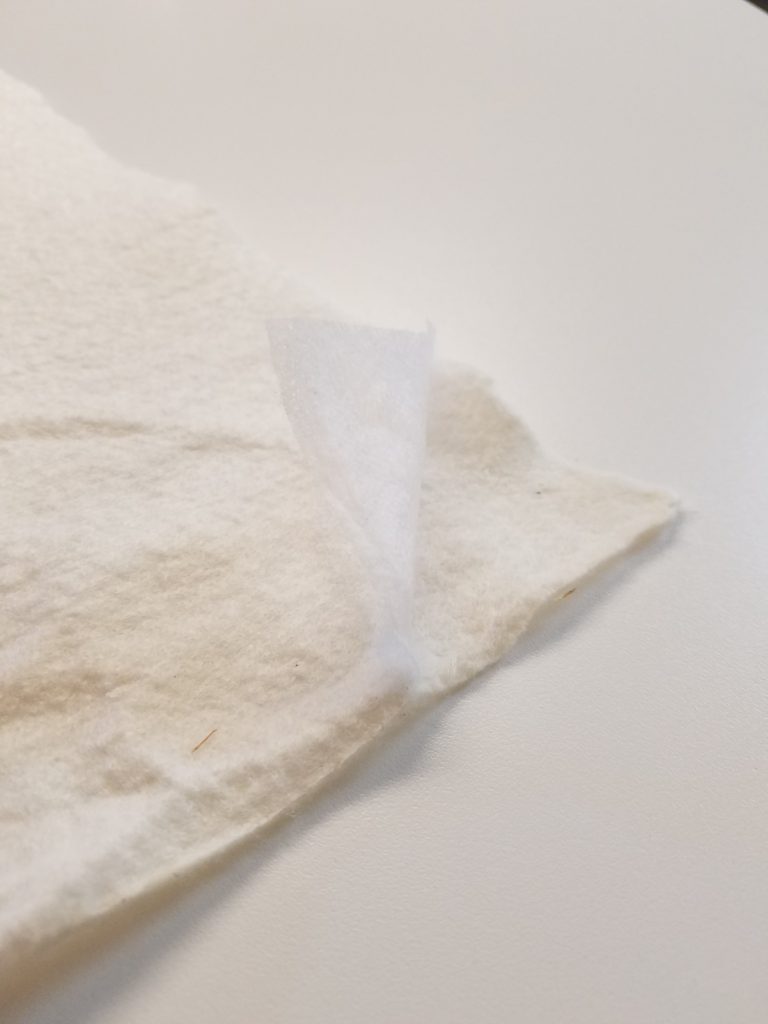
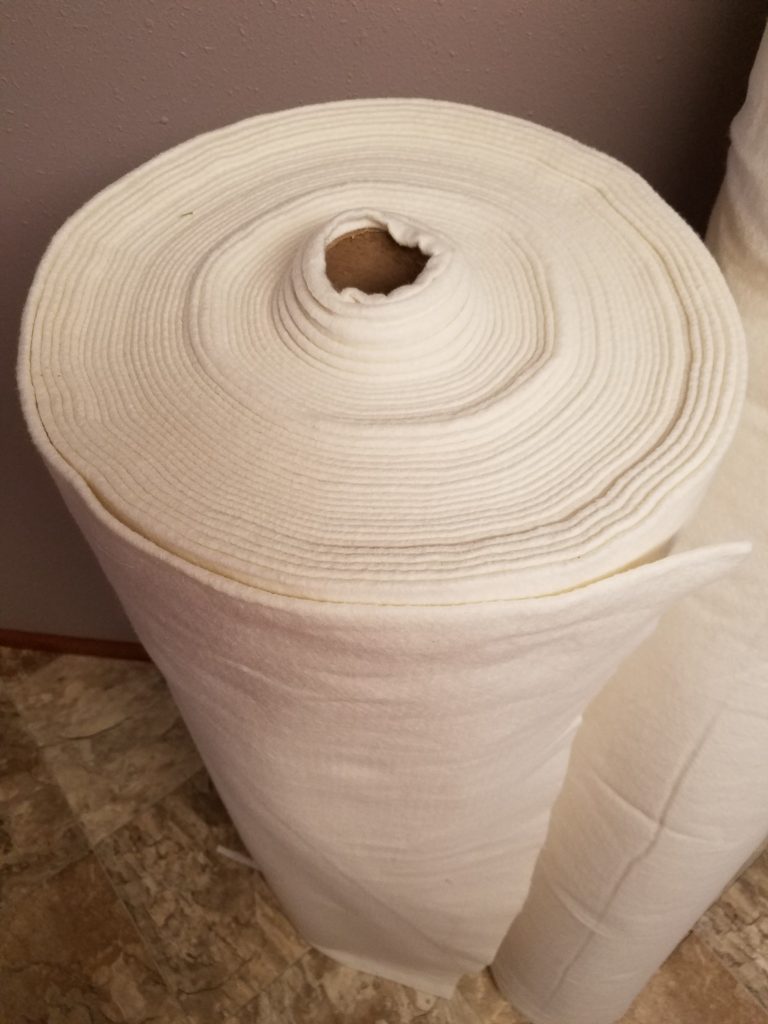 With this batting I can tell which side needs to go to the back of the quilt because of the scrim which is a thin layer of stabilizer that is needle-punched into the batting to add strength, loft, and to prevent stretching and distorting. On this next photo I have pulled my batting apart and I can easily see the scrim. Remember the scrim needs to be next to the quilt backing.
The amount of sizing in your backing fabric also affects this and stitching in general. Based on my experience, wide back fabric contains more sizing, you can tell this if the fabric is stiffer than normal and it almost has a “waxy” look to it. Washing this with detergent removes the sizing and makes it easier for the needle to go though the fabric and decrease the chance of bearding. Wide backs also tend to have a looser weave to them as well, also increasing the possibility of bearding. A tightly woven high quality fabric is your best choice for a quilt backing.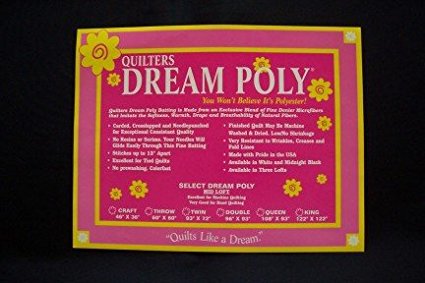
Did you know black batting is available? Here is an option from quilter’s dream that would work well for a mostly black quilt, in addition it will help keep the true colors of your quilt. A white or cream batting will change the hue of a dark quilt in the same way a cream batting will alter the color of a mostly white quilt. In this case a white batting would be the best choice.
In addition to all these preventive measure I do, I also change my needle about every 3 quilts and after a quilt that contains t-shirt backing or aplique where the adhesive can adhere to the needle.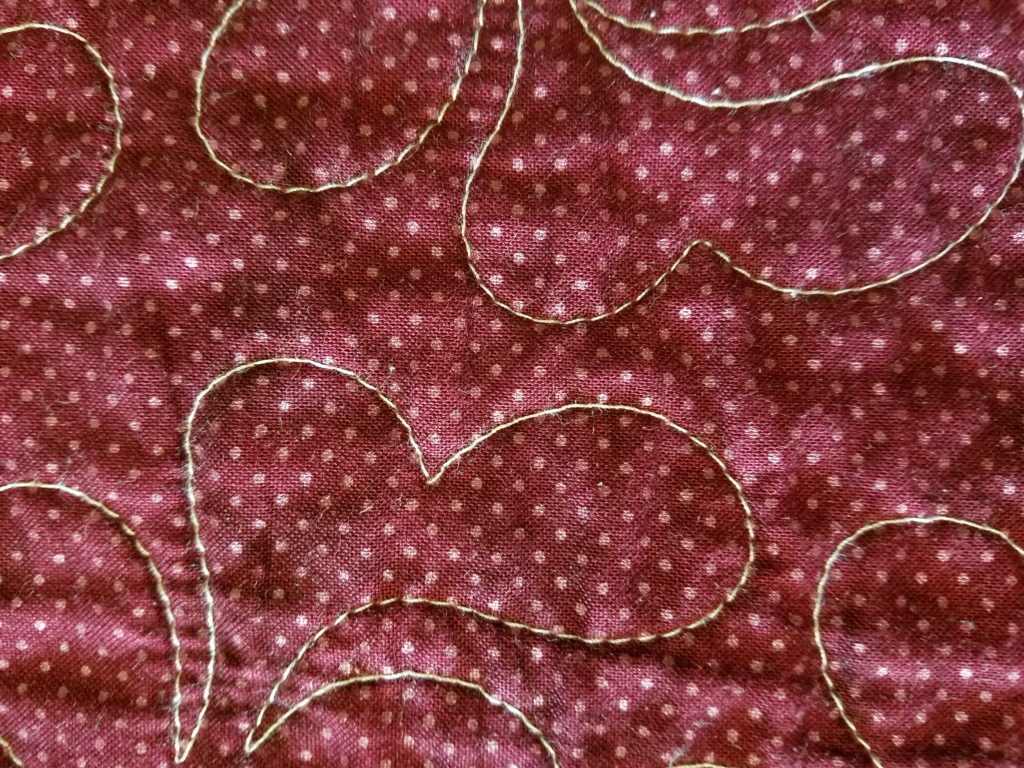
This photo is a great example of what we like to see on the back of the quilt, even stitches with consistent tension and no batting poking through (bearding). I hope what I do to prevent bearding on quilt backs will help you as well, let me know if you have any different suggestions to help others as well. Have a Great quilting day!
Recipes: Strawberry Pie Filling and Scones
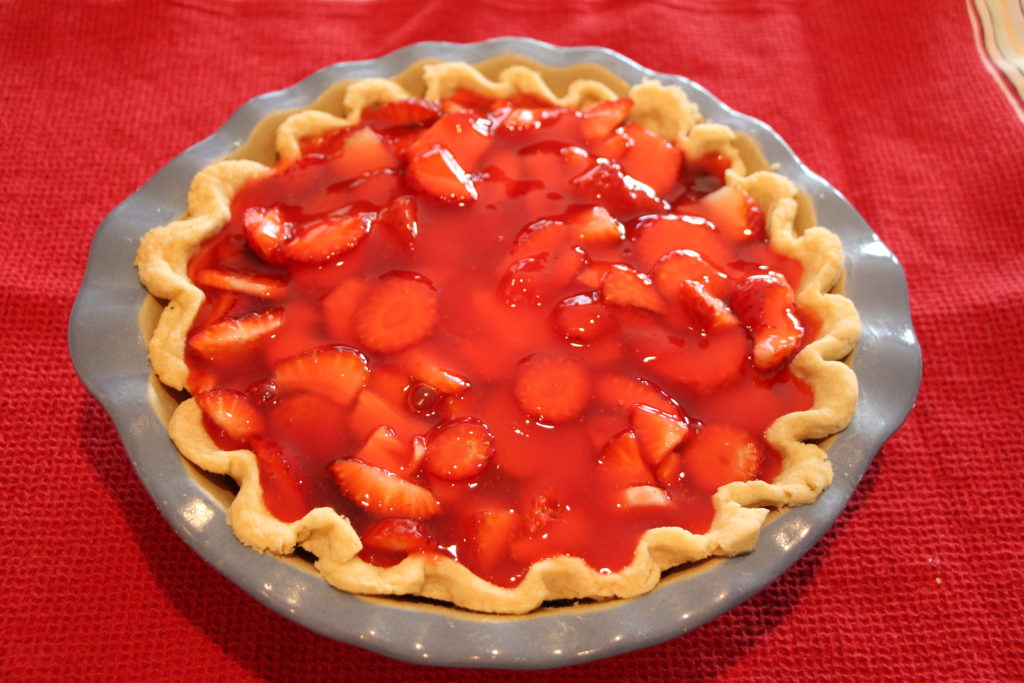
Yum….fresh strawberry pie, with berries now available year round we can have this during any season, but I am sure we would all agree it is best with fresh picked berries. That season will be here around the end of June this year due to our wet and cool conditions now, so in the mean time we can use berries from the store. In my blog last week, “What’s for Supper” I made this pie, and here is the filling recipe.
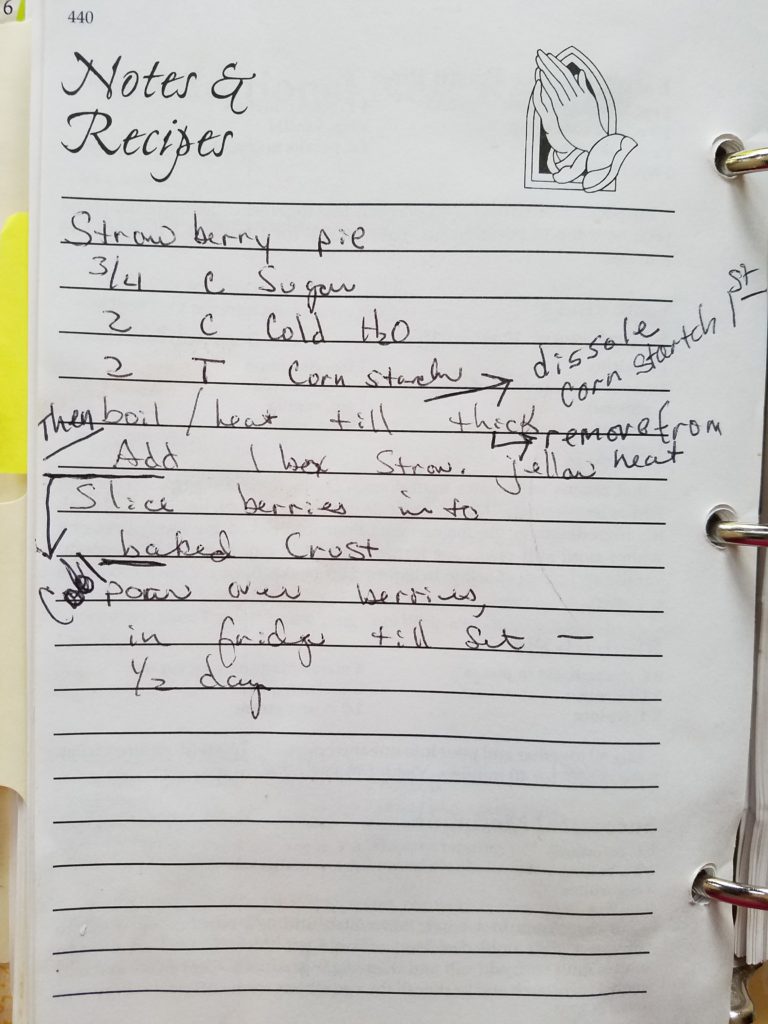
Now, I don’t see a problem with this recipe, the notes to the side were wrote in years ago to help our daughters make this when I was not around, prior to that there was just a list of ingredients. Like many of you out there, There are very few things I make where I follow a recipe, the problem with that is when your kids start baking on their own, they need this. Sure the kids have always been in the kitchen and worked side by side with me, and I just assume then they know how to make something even when there are no directions, just a list of ingredients.
Well I learned to start making notes in my recipe books and rewriting my “chicken scratch” notes after what they were trying to make, was not turning out. The pie filling recipe was rewrote a few years ago when Noelle made the filling, I was not at home and the filling did not set. Can anyone guess why? My list reads 2 T cornstarch, well she knew that meant tablespoon, but my tablespoon was a heaping one! She said to me, “Well how are we suppose to know that.” Point taken, so I rewrote this one.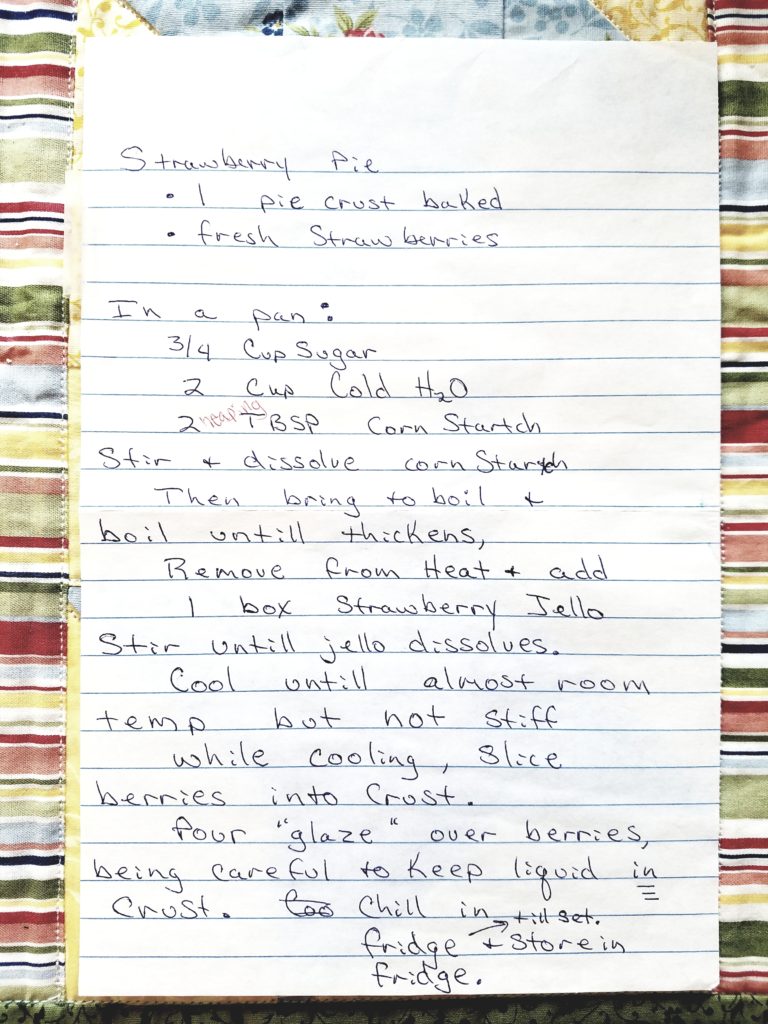
Look how clear and spelled out this is with all the steps and all the measurements are included, except how many berries. Note the word heaping Noelle added, as I forgot this again! Well the kids, usually Noelle have since made this on their own and it turns out great every time. It is so nice when someone else cooks and bakes.
My second recipe to add today is the scones. We never made these at home and none of my aunts make them, but I sure enjoyed a scone and a cup of coffee when we stopped at a small town bakery or if we went out for brunch. I just finally got to the point where I thought to myself, why am I not making these at home. To be honest, it did take me many tries and when you end up with a bad batch it takes me about a month to try again. I would guess it took about 2 years of trying on and off to find a recipe I like. The one I use now is a combination of about 3 different recipes, and by the way, it’s not wrote down yet for the kids.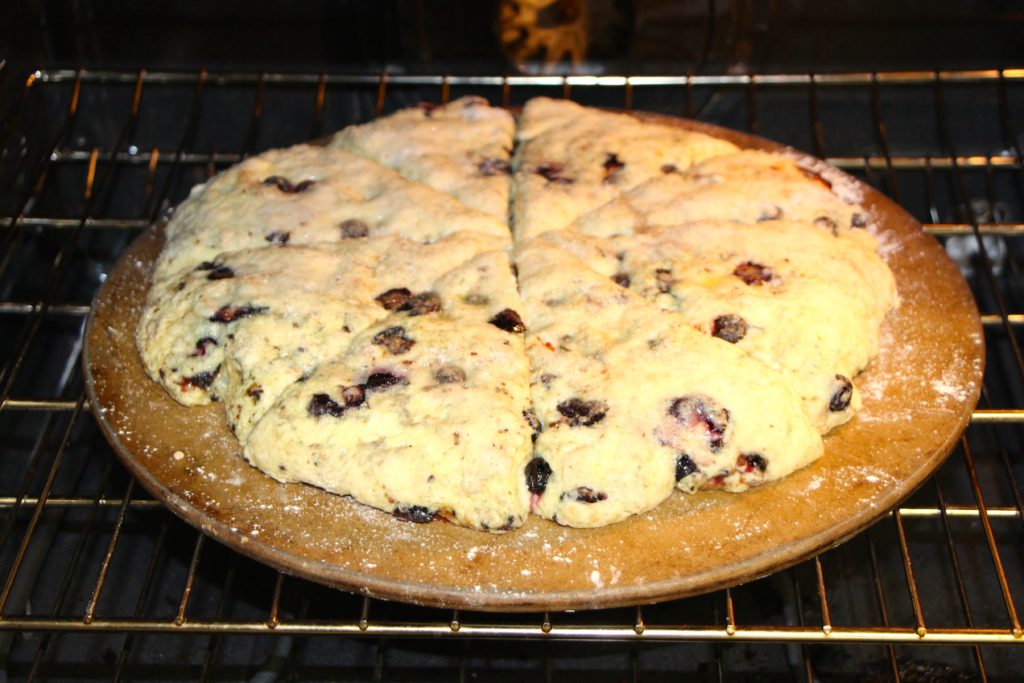
This is a photo of the scones in the oven ready to be baked, this way you have a visual of what I am talking about. As I said in my past blog, I like a scone that has more of a biscuit texture rather that a cake texture, I also like a crust that is almost caramelized on top. Here is the recipe I use.
3 cups flour
1/3 cup sugar
2 -1/2 teasp baking pwd
1/2 tsp baking soda
1-1/2 sticks frozen butter
I grate the frozen butter into these dry ingredients and using clean hands, gently toss. Leave the butter chunks intact, when the scones bake, the butter melts, leaving behind small air pockets in the dough and the result is a flakey scone.
To this dough I add 1/2 cup sour cream and 1/2 cup milk. Gently incorporate the two, do not over mix. At this point add the desired amount fruit and zest, or anything else you would like. Blueberries and orange zest or cranberries and lemon zest are the two I make most often. You can also add nuts or herbs and cheese if you want a savory scone, just any combination you like. Depending on if you use fresh or dried fruit you may need to add more liquid or flour. The dough really does not stay together, I simply mound it on to my baking stone and pat it out into a circle. I also cut it using a pizza cutter before baking. I then brush the top with milk and generously sprinkle it with sugar. It bakes in a hot oven at 425 degrees until done, maybe 15 minutes until it looks and feels done. If it over bakes it will be dry, under baked, it will be doughy in the center. Sorry I can’t be more specific. 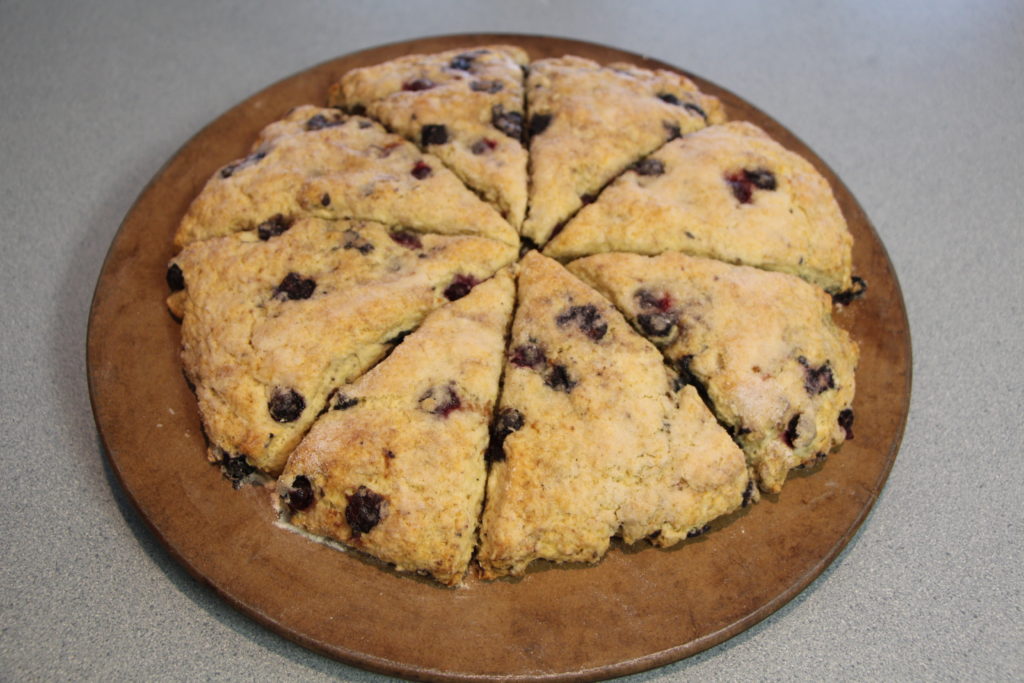 You can eat them right out of the oven, but you will need to cut them again.
I hope you get a chance to try both of these recipes, they both are quick, easy and very good. Please post a question you may have or a suggestion based on your experience making strawberry pie or scones, happy baking:)
Q & A with Carrie
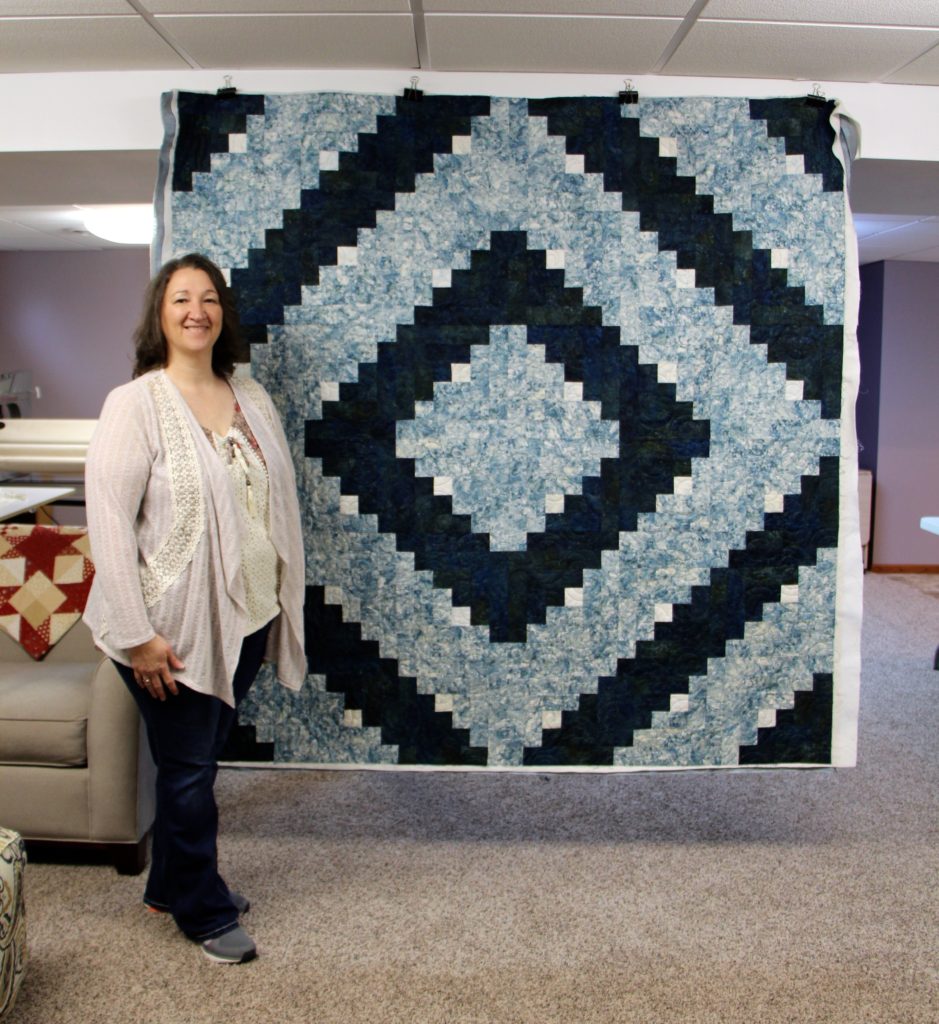
I would like to introduce you to Carrie, another local quilter who works at a quilt shop and has some advice for us shoppers! I’ve known Carrie ever since she and her husband moved up here 9 years ago. They live about 4 miles northeast of us as the crow flies on her husband’s home place. She is a hardworking, down to earth, tell it like it is and always willing to help you out person. She also is a creative quilter and works at a quilt shop, so I was eager to “get the scoop” on the sales and deals there, us quilter’s are always looking for sale, am I right? So let’s hear from Carrie and see what she is up to these days.
Tell me about yourself?
“I live on the home farm with my husband, and our daughter and we have two adult children. I have a General Studies degree from Ellsworth and also attended University of Northern Iowa. I work on our farm and at Red Roxy quilt shop in Decorah, Iowa. On our farm we have hogs, a pet cow and goats. For my hobbies I like sewing and gardening in my raised beds my husband made for me. I also like to raise goats because they are fun to watch and they help with the mowing. We have Fred, Ethel, Bo, Billy, who likes to be scratched, and a few others. Fred is the most demanding of my attention, he is funny and has a big personality.”
When did you begin quilting and what are your favorite projects?
“About seven years ago when our daughter was one. I was looking for a relaxing and flexible hobby. With sewing you can work on it for a while and then come back to it, it’s not like you have to complete it all at once. I like to piece quilts with blocks that are 2 1/5 inch or larger. I also like the Elizabeth Hartman animals as I have just finished Sleepy Sloth and have done Dwight the Deer and Hazel the Hedgehog. There is a lot of cutting and pressing involved, but they are more creative, cute and fun. At work I teach our block of the month classes, Bow Diddley, the Foot of the Month club.”
Do you do other handiwork and tell me about the Element quilt you made?
“I have had a Bernina 440 for 3-4 years now, you can do quilt piecing and it has the embroidery attachment and I like to do both. I did cross stitch for many years. I have tried crochet but never really got the hang of it. The Periodic Table of the Elements quilt was a Christmas gift for Kurt a couple years ago. It’s a king size quilt made of 285 blocks. They were machine embroidered then sewn together and quilted.”I could not get Carrie’s photo of her Elements quilt to load here, but you must check it out on my FB page, I bet you have never seen anything like it!
What projects are you working on now and do you have any projects on your bucket list?
“Right now I am putting together 4 different Sleepy Sloth’s to make a throw. Someday I would like to make a log cabin piano quilt.”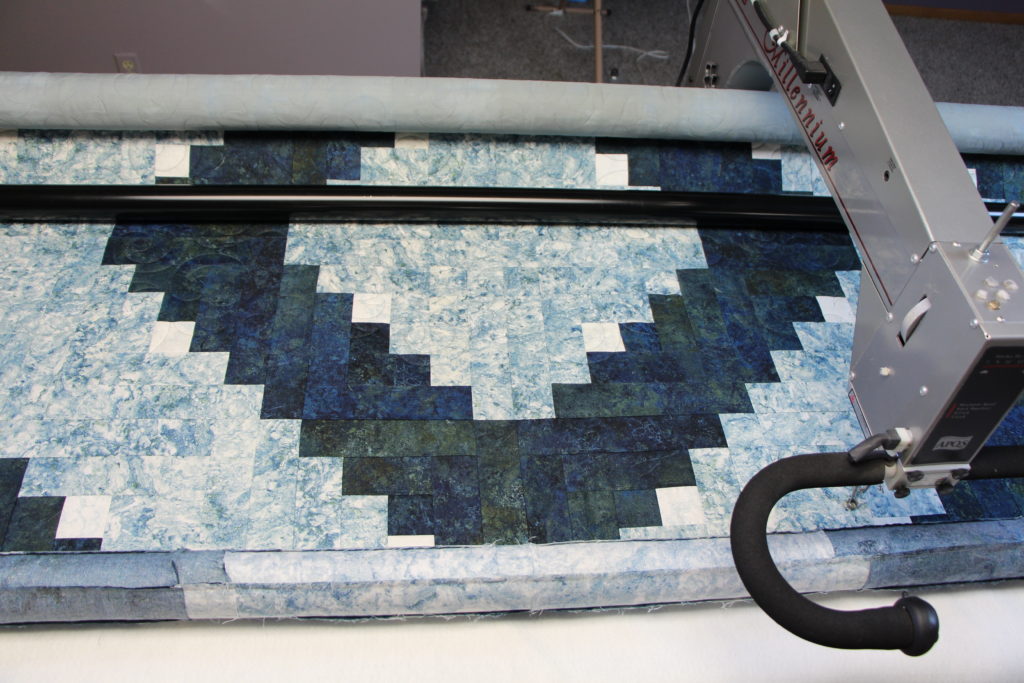
Tell about this current project?
“The fabric is the Stonehenge line by Northcott fabrics that I purchased from Quilter’s Window in New Hampton. I was asked to make a quilt for a friend who drives truck and this will be his sleeper quilt in his semi. The pattern is a log cabin pattern that I designed myself. My husband often helps me with color balance and placements of blocks. If I am not sure of a layout, I just have to let the blocks set and he will then move them around to create a design, this helps me because then I just have to sew them together. On this quilt you can see the white blocks are the center of the log cabin block, I like the contrast of the light and dark colors and how it turned out.”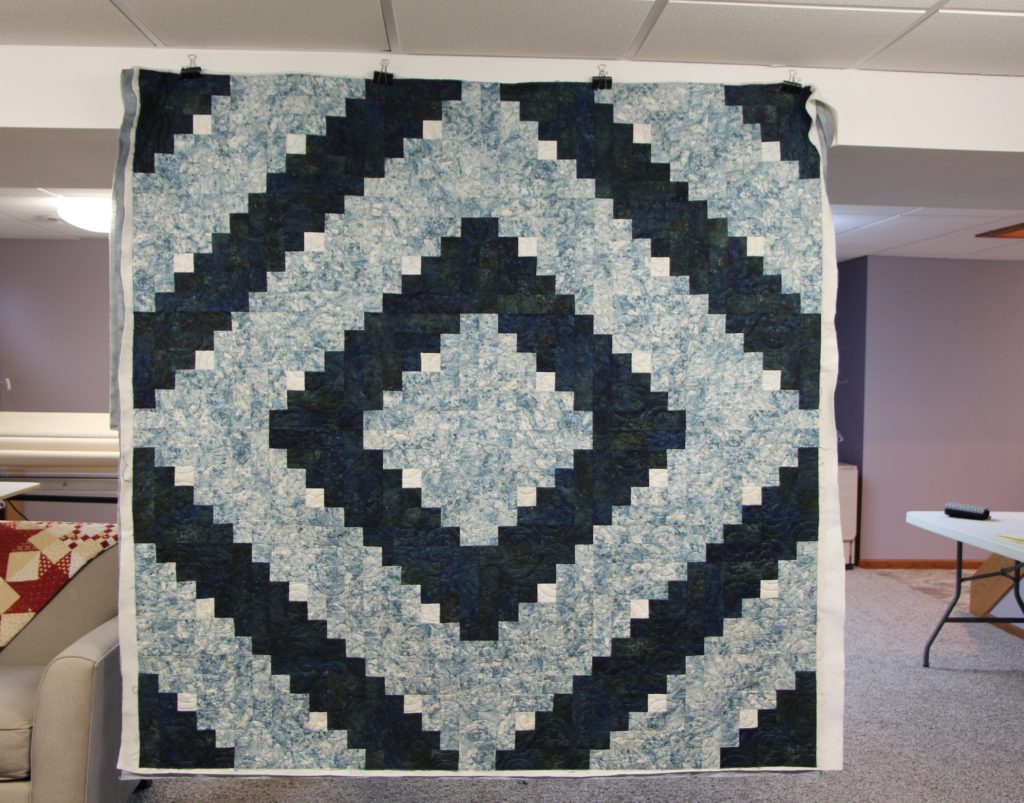 Carrie chose the green thread and the Plush pantograph for her quilt.
Based on your experience of working at the quilt shop, give us customers three tips that we should consider before going in to a shop?
“Many times people will come in looking for more fabric for a quilt project they are working on and they don’t bring along any of the fabric they want to match. So if this happens to you, please bring in some of the fabric you have so we can help you pick out more. Since we are talking about matching fabric, when you come in to our shop, please know we may not be able to “match” your fabric. Be open to other possibilities as we can most likely find you something that will work. The last suggestions I will give is when you pick out fabric and ask for help it is a process, I will not tell you which one you should buy. I will offer suggestions and help you through the process, but you will need to decide, remember you are not going to hurt the fabric’s feelings if you don’t choose that one!”
What should others look for in a longarm quilter?
“A longarm quilter should have experience, be knowledgeable in quilting, have the ability to do custom and help the quilt owner bring creativity to their quilt. ”
Tell us your words of advice for new quilters walking through Red Roxy’s door for the first time?
” When you think about it, for a first time quilter a quilt store is overwhelming. The shop is filled with fabric bolts, fat quarters, finished quilts, patterns, machines, notions and a variety of other items. So my first suggestions would be to not get overwhelmed and breathe. Ask us for help and take a beginner sewing class. A good place to start is to find out what color they like and then go from there.”
Final thoughts Carrie?
“Any hobby should be fun. Quilting has the bonus of being useful and long lasting! Have fun with it. Be creative, be you! Oh, and shop local!!”
What’s for Supper?
What’s for supper, as a mother how often do we hear this in our life time? I am probably like you when sometimes you just don’t feel like cooking or even worse, there is no plan for what to make! A plan makes preparing supper so much easier and when we remind ourselves that we are thankful we have a kitchen and food to cook we stop feeling like this is a burden.
Supper here is usually around 6. My husband Todd will eat as he comes home from his business Fredericksburg Plumbing and Heating and before he goes to my parent’s farm where he helps with chores, field work and anything that needs to be done. I think I do pretty well with the meals to keep it warm or that it is on a plate ready to warm up if I am not at home. We also send meals to the farm everyday day for my parents, because my mother is disabled and my brother has a learning disability. When I cook meals I plan for at least 6 servings and often make extra so we can have left overs, this way it is an easier meal prep every other day! Here is an example of what I made one day a few weeks ago.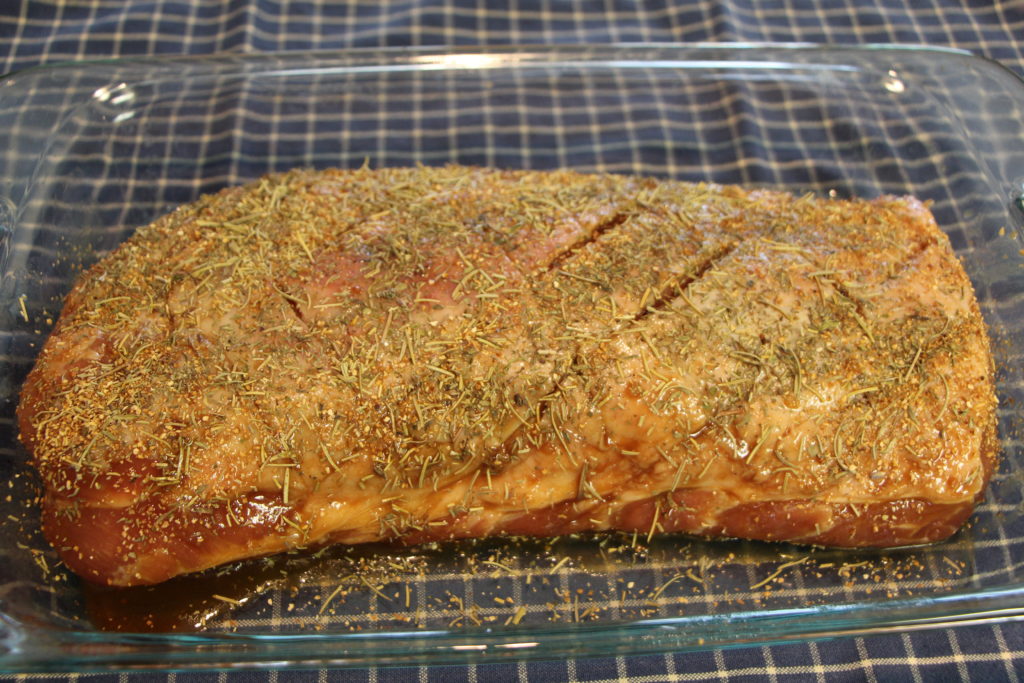 My apologies to you if you do not eat meat, I grew up on a dairy farm and we also raised our own chickens so this is what we ate. This is a pork loin and it is an easy go to main dish. I can usually buy the whole loin (about 10 pounds) for $1.89 to $2.29 a pound it is a better price this way. At home I will divide this into thirds to make sliced BBQ pork for sandwiches, chops or roast. On this day the roast was kept out for supper and the rest of the meat was packaged and frozen.
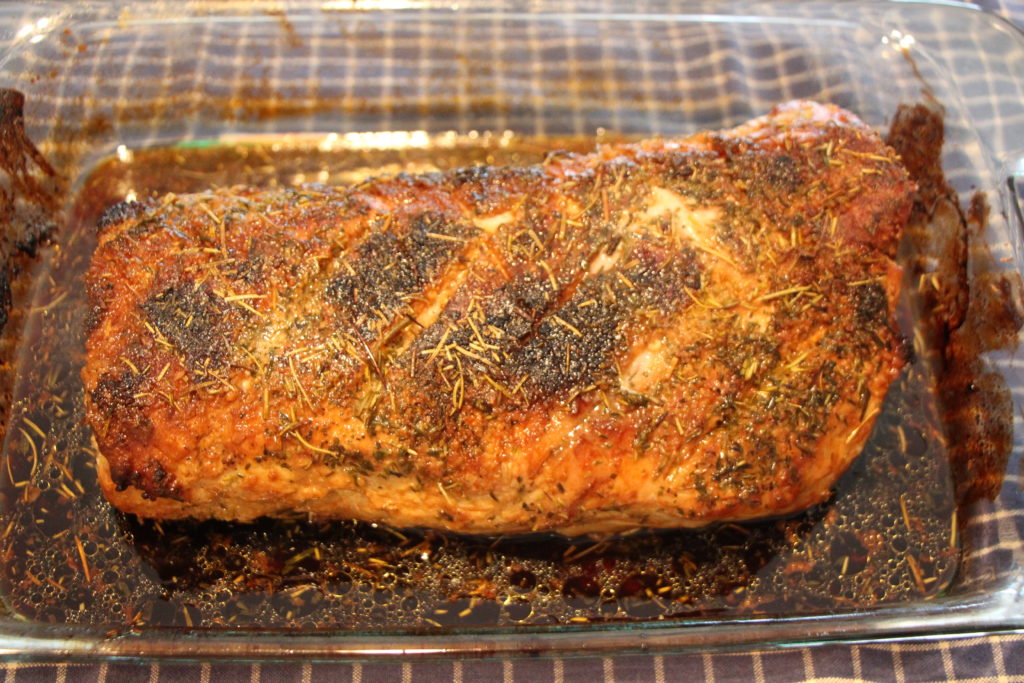
Prep time is super short as I rubbed a generous amount of seasonings on all sides of the pork, here is what I used.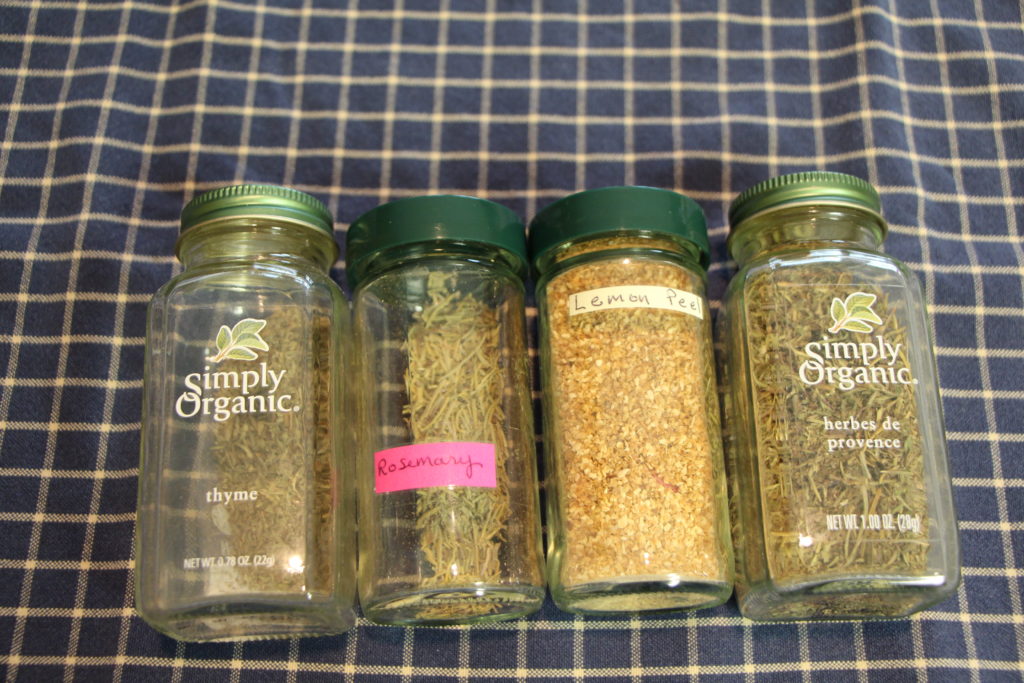 I buy my seasonings from the Oneota Food Co-op in Decorah, Ia, it is a great store and I will talk about that in another blog. As you can see, thyme, rosemary, lemon peel and herbes de provence, which is a combination of herbs including lavender flower, were used this time as there is such a variety of options. The pork is then put in the oven with a small amout of liquid in the bottom of the pan, at 350-400 degrees depending on how much time I have, a higher temp decreases roasting time, until the internal temp of the pork is about 145 degrees, I then let it rest for about 15 minutes. It is then ready to slice or I keep in in the oven using my “keep warm” setting at 170 degrees. I have had a Jenn Air oven for many years, so I use the roast setting for the pork as well.
At this point I can go to my longarm and quilt, keeping my timer close by I can set it and then check on the oven as needed. Another option would be while the oven is hot, you might as well make something else, words from my mother, so pie crust it is. In a past blog I have noted that we like pie here and in “The Recipes” you will find the pie crust one we use and a few recommendations for that flaky crust we all love. Today in the fridge there are plenty of strawberries to be used for a pie before they spoil and some blueberries to be used as well. When the pie crust is completed it will go in the oven with the pork on different rack. I like to use the convect bake setting on my Jenn Air, but today the crust will be just fine on the roast setting.
 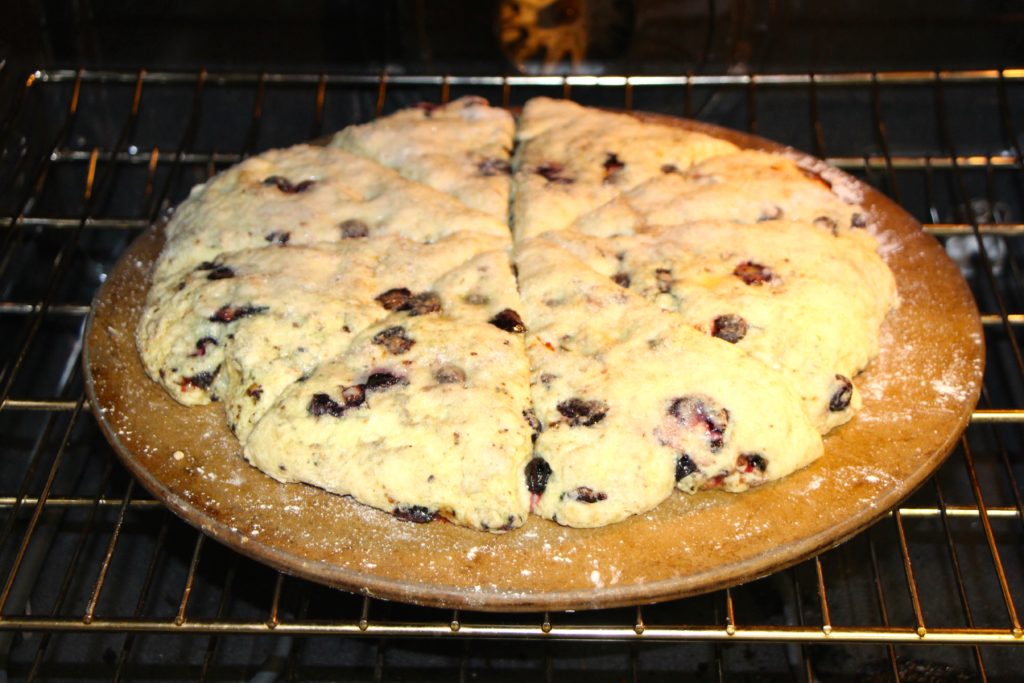 Next I will move on to using up the blueberries and will make scones, blueberry and orange peel is a nice combination. I have figured out a very good recipe for these after trying for a number of years, I combined a few to make this one to my own liking. Scones should be a little on the dry side, more like a biscuit or crust like texture rather than a cake or bar like texture. Frozen butter and sour cream are my two key ingredients that I think add to the flavor and texture and I will share my recipe in another blog. While the pie crust is baking, I will mix up the scone dough and pat it in a round on a baking stone, then out with the pie crust and into the oven the scones go!
Next the filling for the fresh strawberry pie is cooked and cooled a bit, I can speed up this process by putting the filling in the deep freeze or put the pan in the sink with cold ice water surrounding the pan, either works efficiently. Usually by this time the crust is cooled and I can slice the strawberries into the crust and then pour the filling on top and then into the fridge for about 2 hours or until the filling is set. I hear the timer and check on the scones, the top is a nicely golden brown crust and they feel and look done, we can eat them for supper and for breakfast tomorrow morning. At this point I will go and quilt again until the pork is at about 145 degrees internal temp, here is what it looks like when it is done!
 I will let this rest a bit and then slice it up to serve with some frozen vegetables, scones and of course, pie for dessert!
I like to be efficient with my time, being able to coordinate the things that need to be done that day does take some planning and after one has done it that way for years it just becomes second nature. Of course we all have days when the planned schedule just seems to fall apart and at that point we need to be satisfied with what we accomplished that day. Tell me your suggestions, what works for you to complete your schedule for the day? Now, I think I will go make more pie! Have a Great Day:)
Recent Quilts
As I meet with a customer or open up a quilt I received in the mail it gives me the opportunity to work with other creative artists and help them complete their works of art. I recently reminded myself of the beauty of the quilts I have done. One of the most important attributes I have noticed is that all of them have been accurately pieced, not perfect and we should not expect that of ourselves, but they are pieced to the point where there are no obvious mistakes or errors and the quilt is flat.
I remember back to the days when I longarm quilted at the quilt shop and every so often we would get in a quilt, made with love, but you see, maybe it was new love? Sometimes I would lay these quilts out on the table and there would be hills and valleys, no flat plains for this one. Another issue would be the borders, oh my. The extra fabric, maybe from stretching when sewing, or not measuring the quilt before applying the border caused this to happen. “What am I to do” I would say to my boss, how do I quilt this, how do I fix it? I think she had seen all this before and would politely say, “do the best you can.” So that is what I did. Sometimes I would sew a seam in the border to take in the extra fabric. To eliminate the “fullness” of the quilt and help it lay flat, I would tighten the quilt on the frame. I do not remember a time that a customer complained about the quilting and I am pleased with that.
So, back to my recent customer quilts, kudos to all of you for taking the time and have the ability and knowledge to sew such well made quilts, let’s look at some!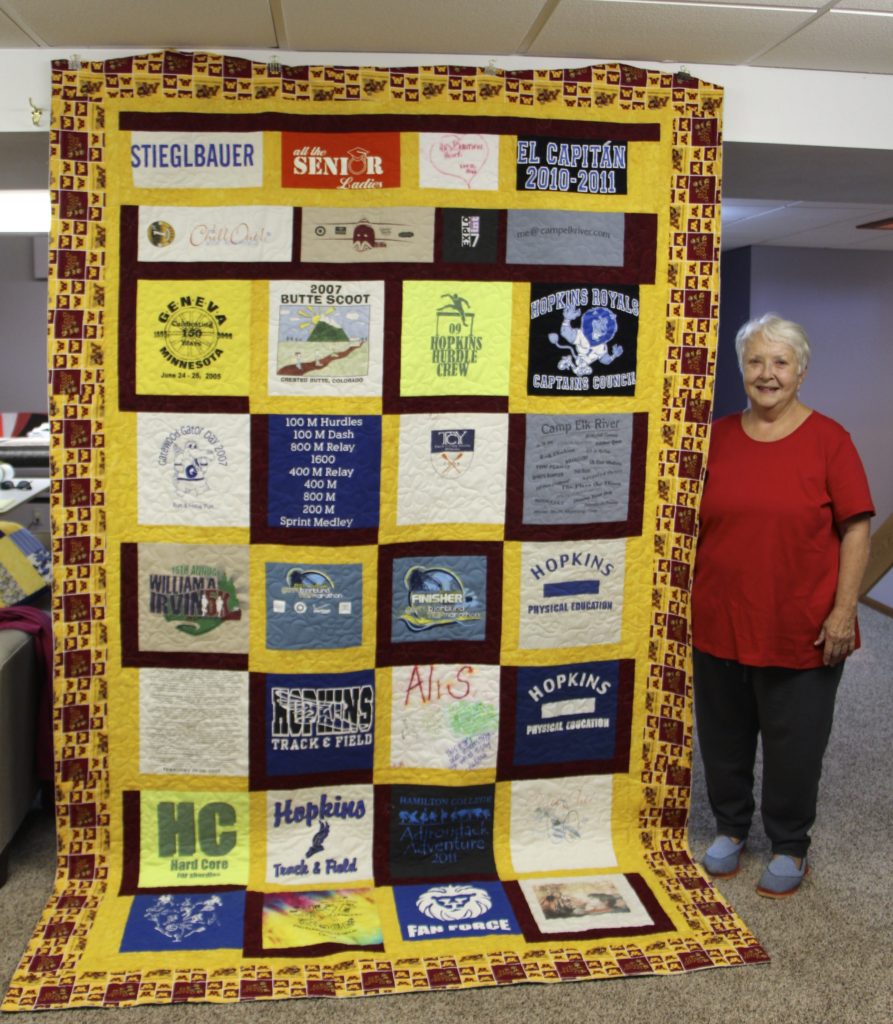 Cheryl from MN made this one for a co-worker’s daughter. It is her design as she did not have a pattern to follow. I don’t think she is especially fond of t-shirt quilts, but this one turned out great and I am sure the Minnesota gopher student will make good use of it on those cold winter nights in her dorm room.
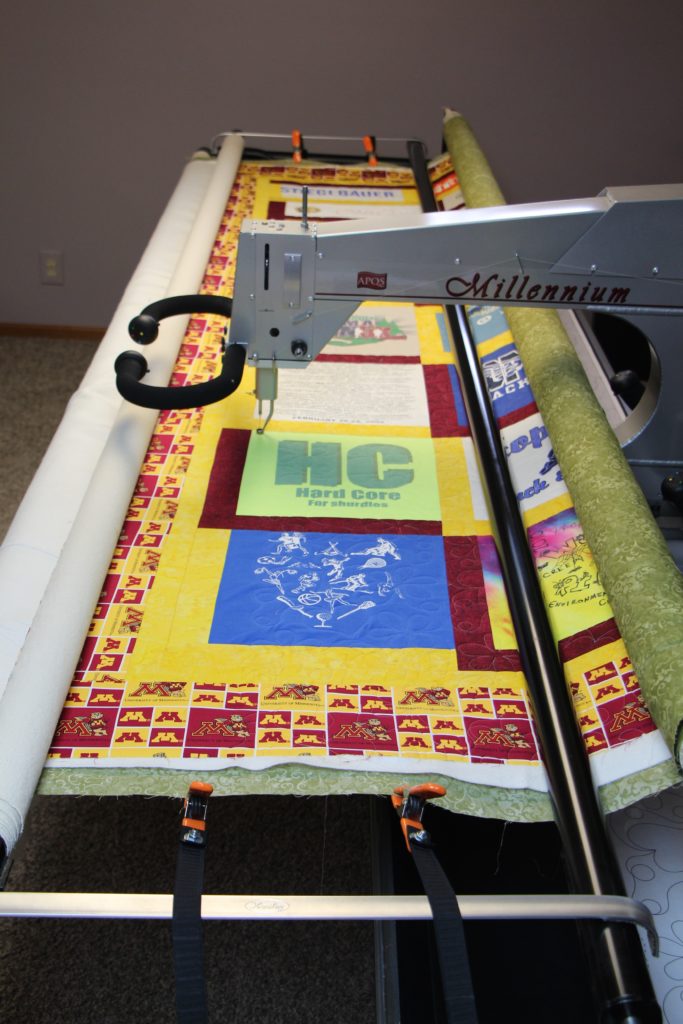
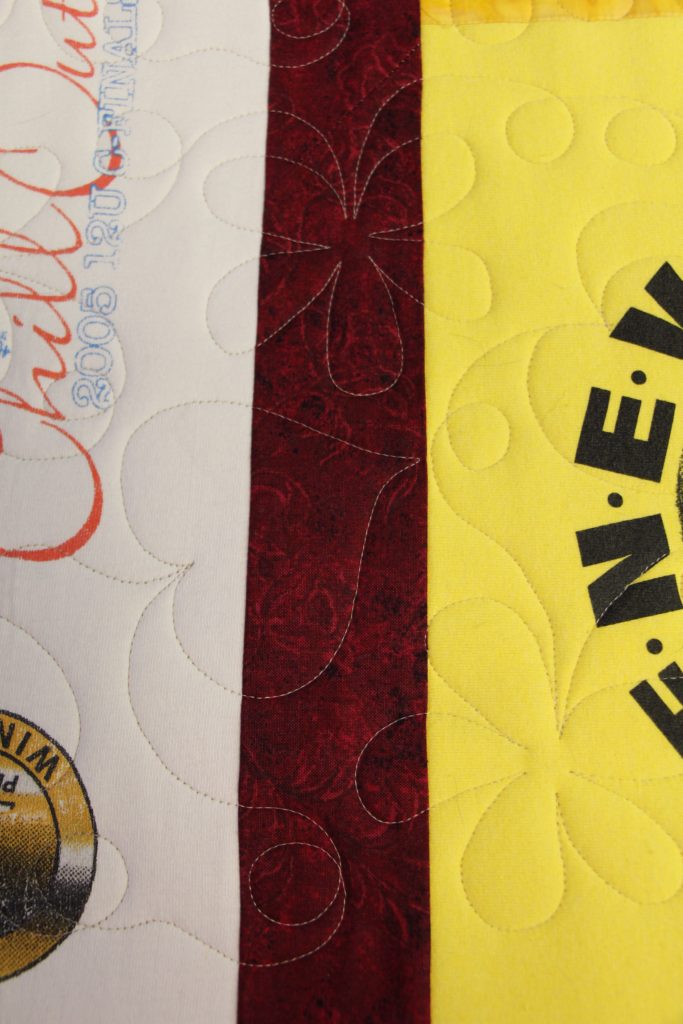 Cheryl choose Hearts in Bloom pantograph for this quilt. I was happy to work with Cheryl as she brought the quilt to me on a Monday and picked it up on Friday! Happy Quilting Cheryl!
Let’s look at a more traditional one now, this one belongs to Barbara, also from MN who likes to support independent longarm quilters.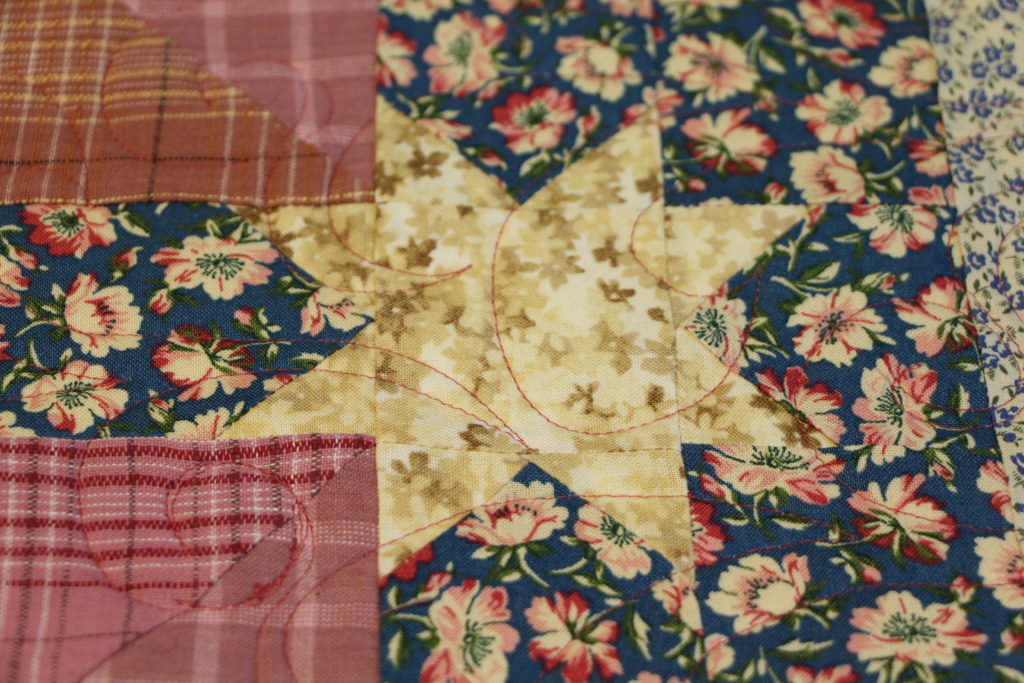 It may be hard to see because of the fabric patterns, but almost all of her points and seams match, I can tell she has been sewing for a while.
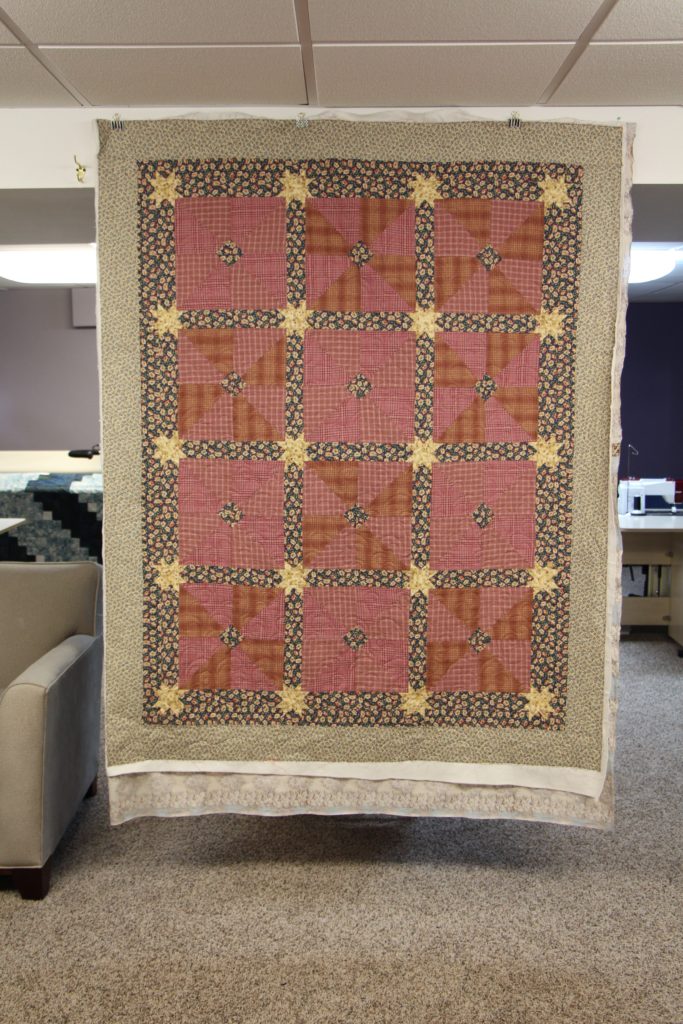 This is her completed quilt with the Nouveau Feathers pantograph which combines the traditional feather pattern with a modern twist. A dusty pink thread was chosen to complement the pink blocks and flowers in the border.
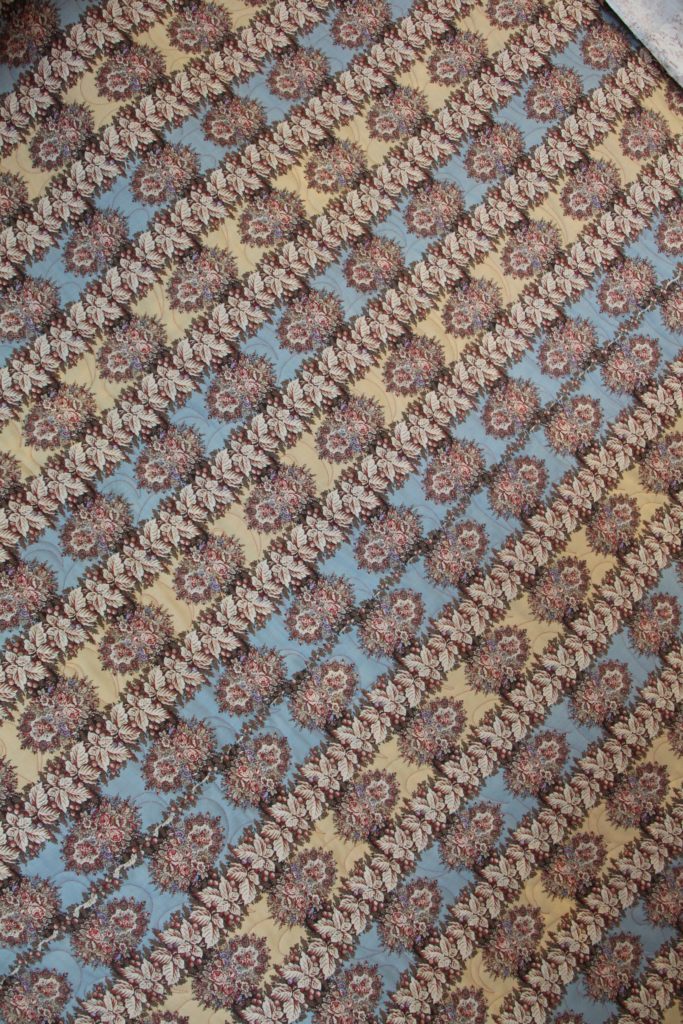 Now lets look at the back seam, if you can find it! Barbara made a lovely quilt, maybe she will keep this one and I look forward to working with her again!
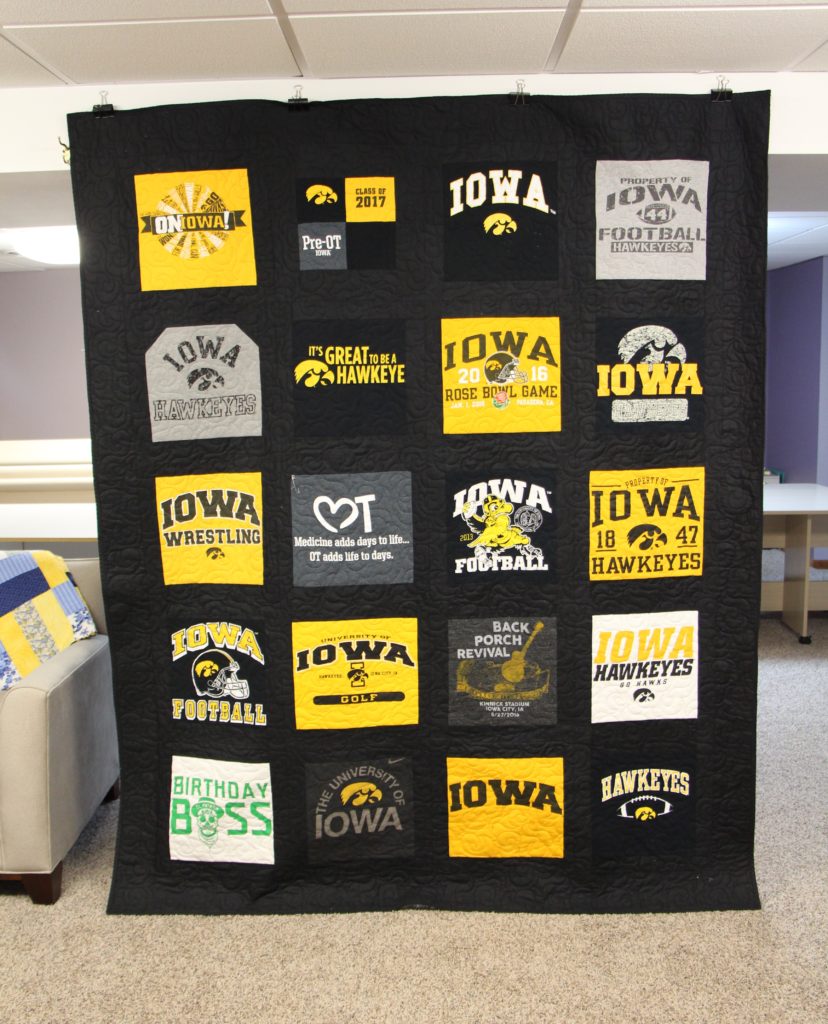 The last quilt we will look at is from Ellen in New Hampton who’s daughter graduated from the University Of Iowa. Ellen had the quilt top completed, but the local quilt shop was not able to get it done in time for the graduation. I met Ellen on a Sunday and by Wednesday, the finished quilt was in her hands. I even completed the binding for her because she is a busy working woman with limited extra time.
 This little block was one of our favorites because she used the shirt sleeves to make this. I think it adds some variation to the overall appearance of the quilt, and she needed another block, good idea! Tendril, is the quilting pattern she picked as this one is a popular one.
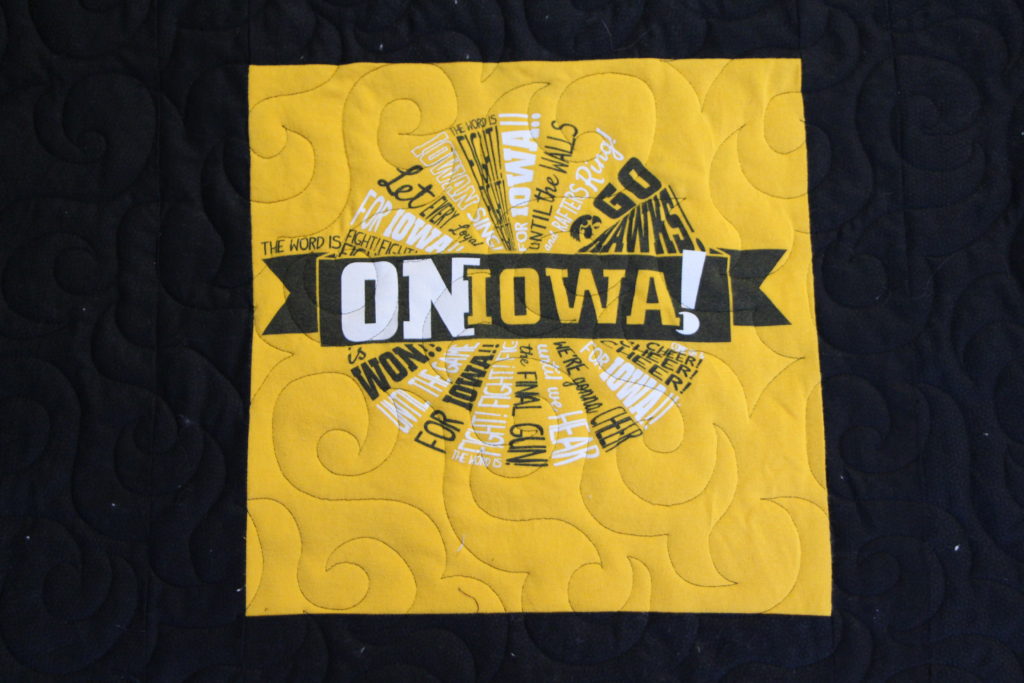 This cute block contains the words to the school’s fight song so everyone can sing along! With her completed quilt in hand Ellen was able to surprise her daughter and I was excited to help her out!
I really do have an awesome “job”! I work out of my home, I interact with new quilters, my studio is an ever changing art gallery and I can help others complete their goals. Life is Good:)
Malanaphy Springs, Decorah Iowa
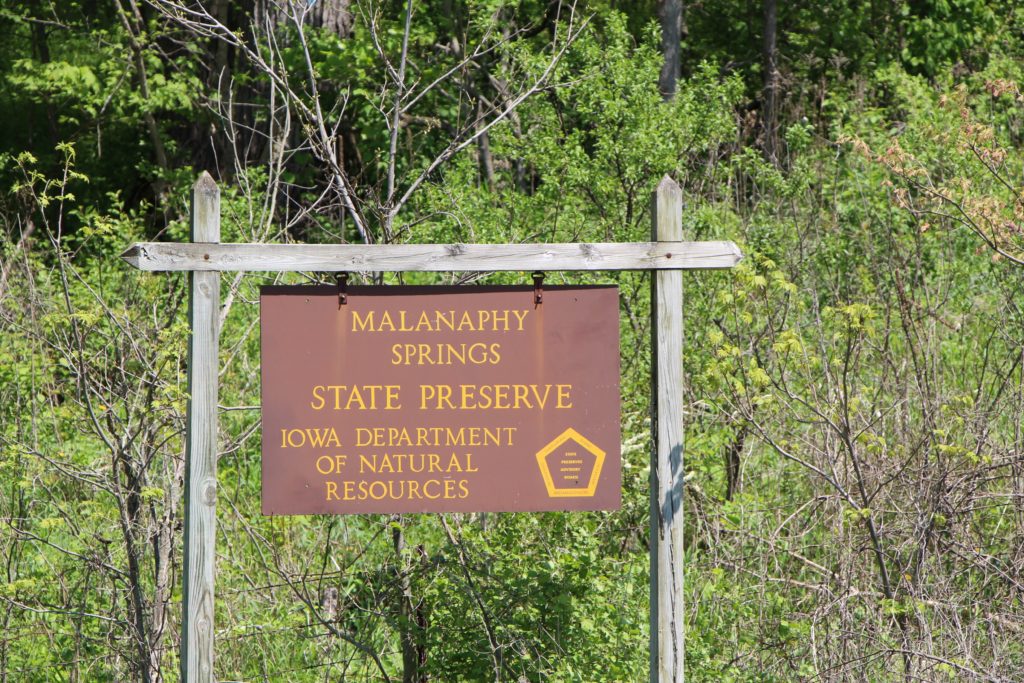 This past Mother’s Day we just had one daughter here so the two of us went north to Decorah to re-visit Malanaphy Springs. Last year on my birthday my friends and two of our daughters went there for the first time and I wanted to go again. Gene Anne was in to go to because she and her boyfriend, Spencer went about a month ago but it was very wet and they had to go through alot of water to get to the springs.
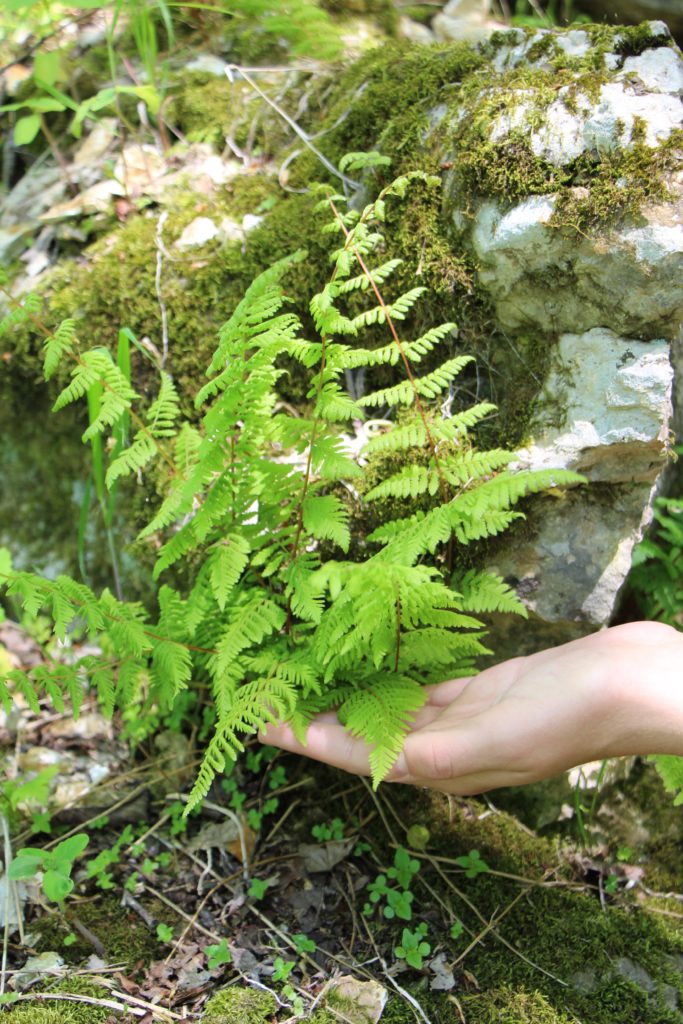
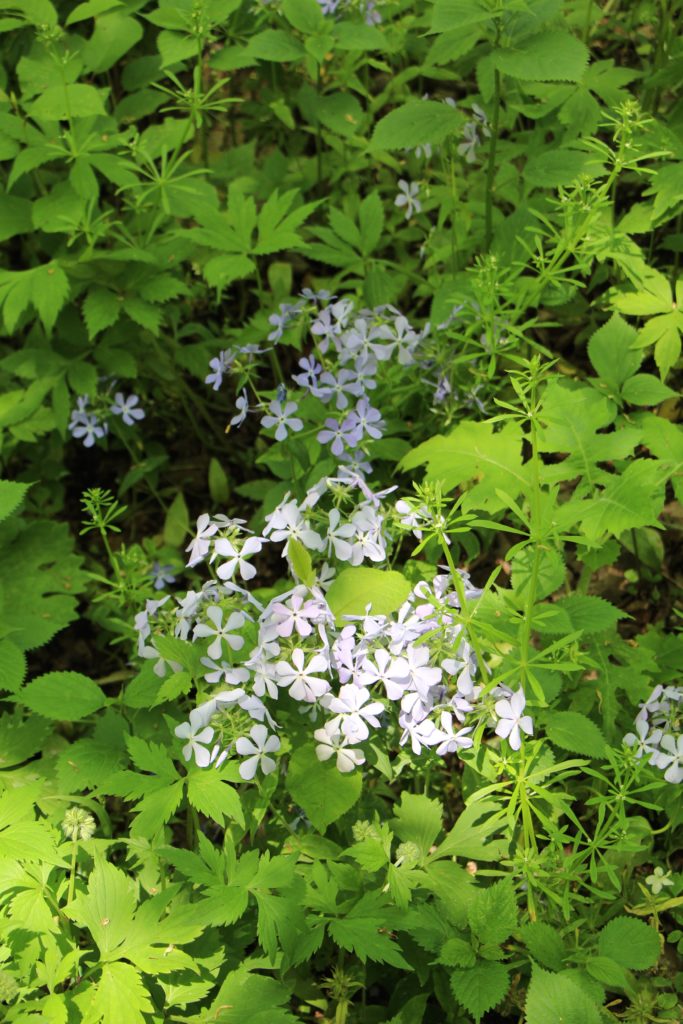 It is about a 1 mile hike in on a dirt path which is usually easy to navigate. Along the way there are wild flowers, beautiful trees, delicate ferns and vegetation. You will also see birds, chipmunks, bees and other critters you typically see in the timber.
 There are also “obstacles”, tree roots, rocks, fallen trees that one needs to go over, under or on top of for a great photo!
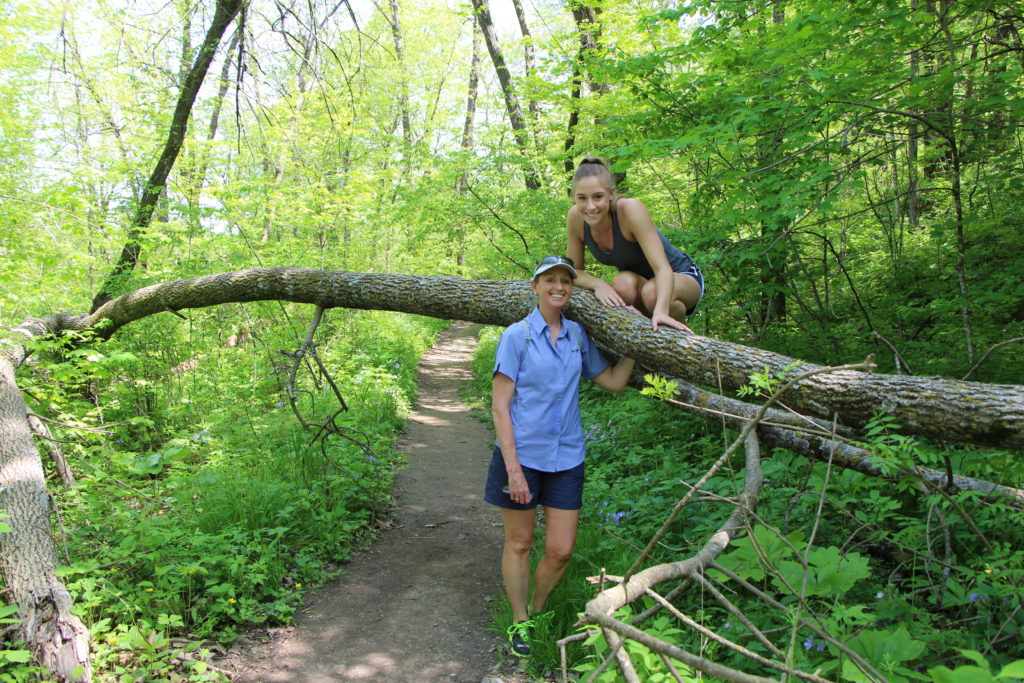 We are pretty friendly and trusting folk, of course we say “Hi” to everyone we pass and we are always asking others to take a photo for us! Along the way we passed by a little guy, I suppose he was about 3 or so, I jokingly asked him, “Are you out on your own today?” and after he ran passed me, Gene Anne heard him say he was looking for his Mom. well, we had not passed any “Moms” recently, so Gene Anne went to walk with him and I kept going ahead. Shortly up the trail I came upon a gal with 2 other children and told her we passed a little boy in a blue shirt and if he was with them? She said no, that they were there with alot of kids but they had all of them. Within a few seconds, a another gal came up to her looking for her boy, saying she could not find him and started running back down the trail. I told her that our daughter was with him and about that time, Gene Anne showed up carrying the little guy. His older brother gave her a big hug with his very muddy hands as he was playing in the water. So all is well as I told Gene Anne she “saved” a child today! We had a good laugh about it afterwards, because little kids can be very quick and if they go off exploring, sometimes they cannot find their way back.
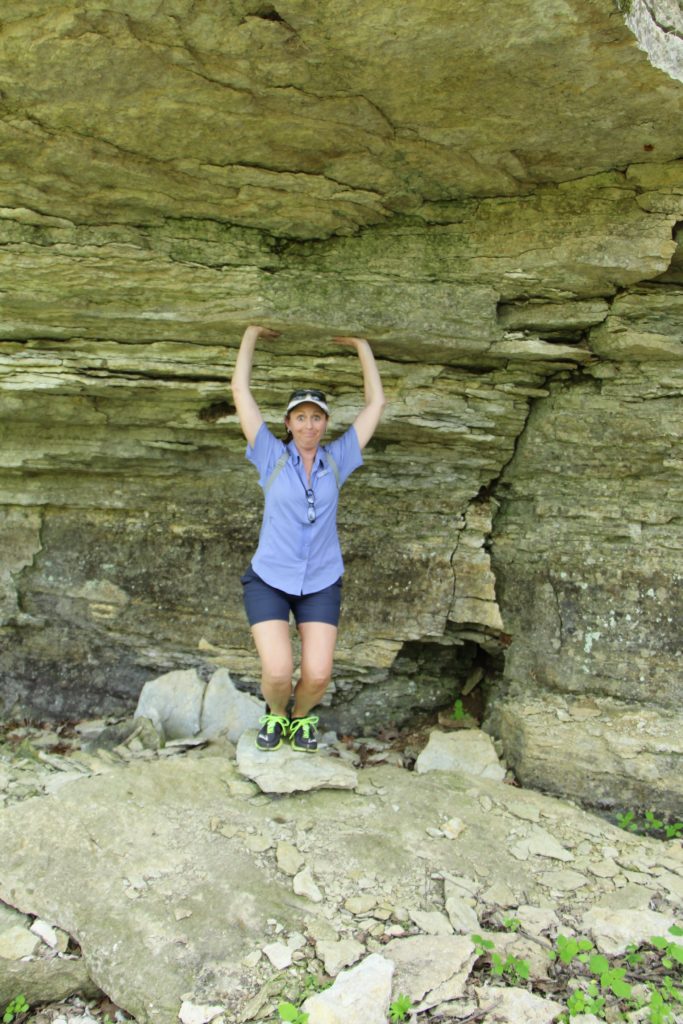
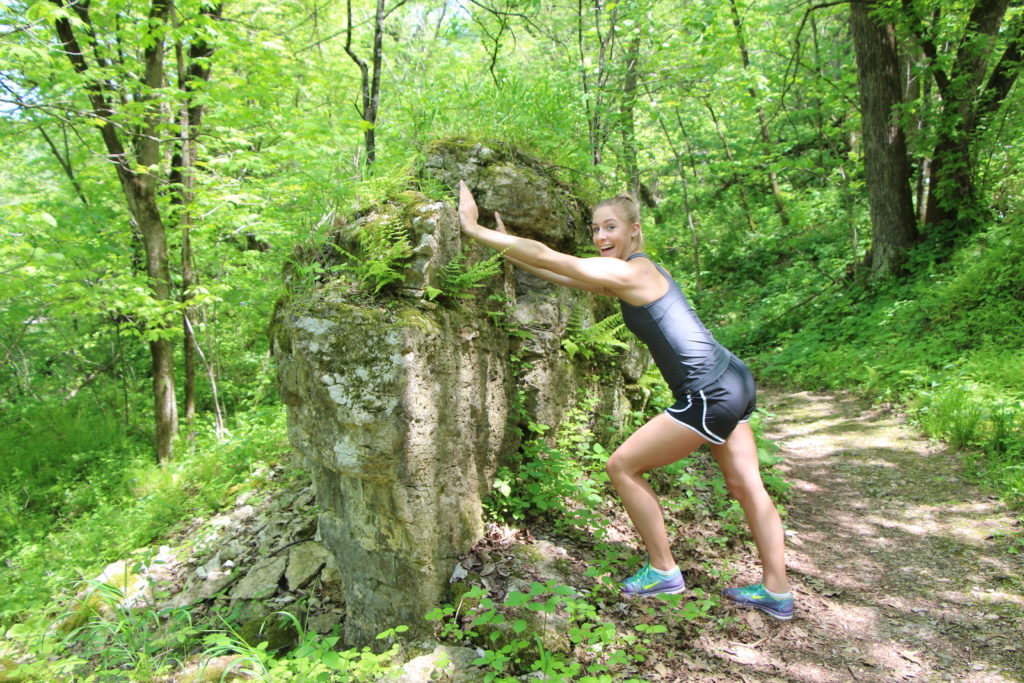 We also took some funny photos. Here Gene Anne is trying to push the rock over, and below, I am trying to hold the rock up!
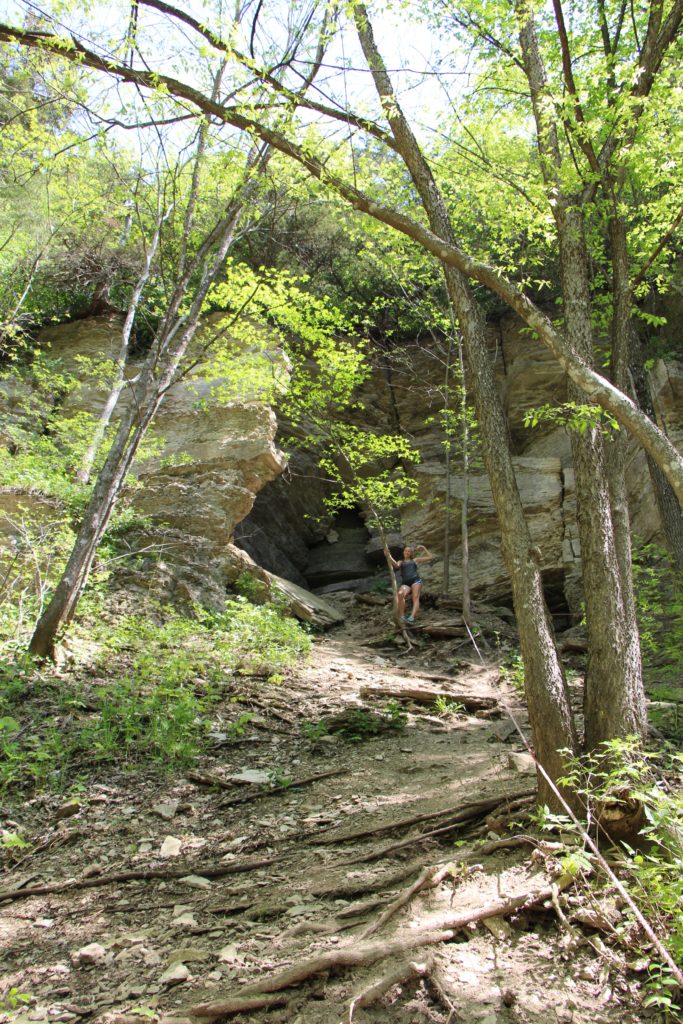
 There are many deer paths along the way that people can easily take to go “off the beaten path” and a make shift rope to use to get get up the rock bluff to the mouth of the spring. I went about 1/2 way up and here is Gene Anne almost to the top. She did safely get up there and back down without injury.
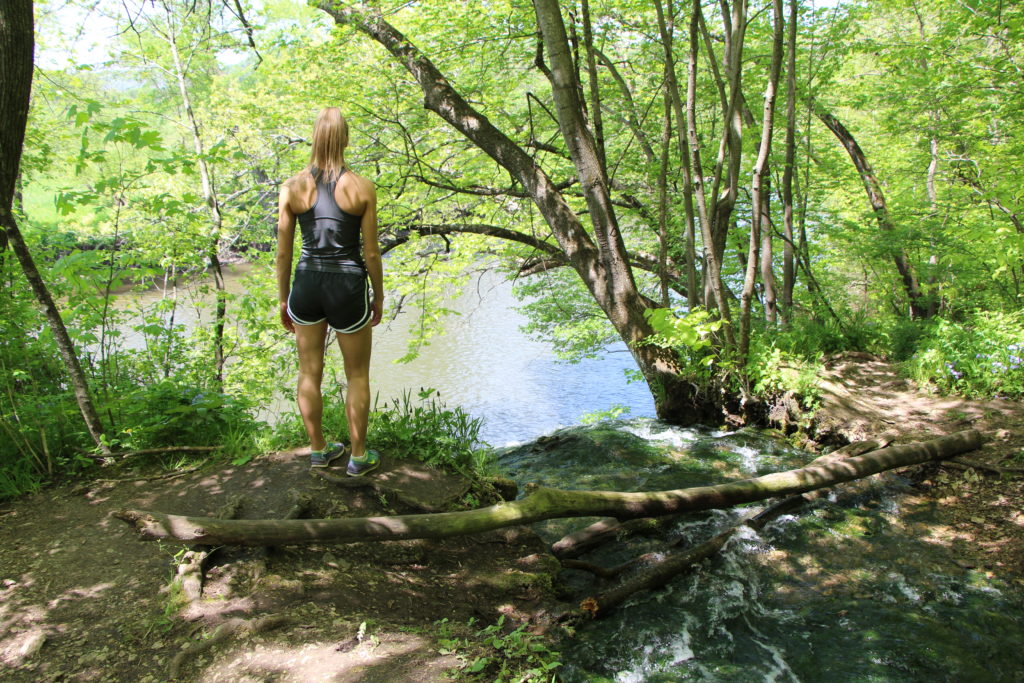
 We finally get to the end where the spring water flows over a rock bluff and down to the Upper Iowa river
 At this point you cross to the right and scale down the dirt path which I would estimate is 10-12 feet. It works best to go down backwards and use the exposed tree roots to hang on to. So at the bottom, there it is, the beautiful falls. The cold clear water splashing down onto the rocks and into the river. It is a beautiful unique feature here in NE Iowa.
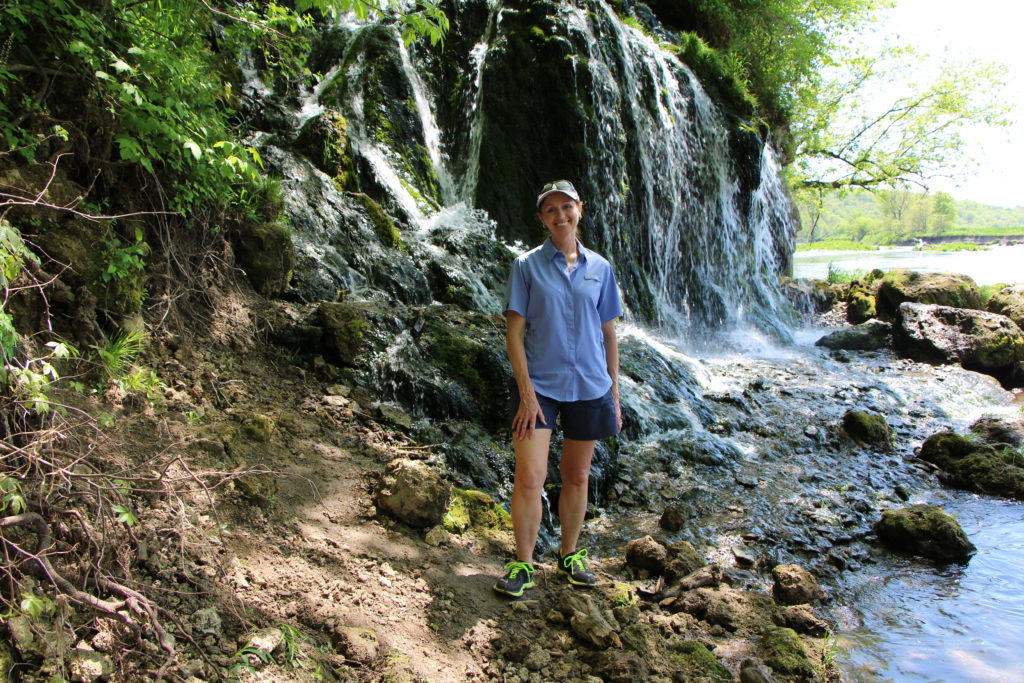 We take some time to enjoy it before climbing back up to the top and start our journey back.
 If you decide to check out this site, be sure to visit the website to get specific directions as there is no “address” at the falls. It is good to get out and into nature as it feeds our mind and soul, it also helps us to reset and reconnect and inspire us. Oh, I have an idea for a Quilt, see how this works! Take sometime today to get out and enjoy nature and have a Great time doing it!
Sewing Projects
As most quilter’s understand, there are usually projects that come up or need attention sooner than later, altering Victoria’s dress was one of those. You don’t hear me talk to much about Victoria, who is our oldest daughter because she lives in Daytona Beach, Florida with her boyfriend Grant. Here is a photo of them at the Wishmaker’s Ball that was held this past Saturday in Orlando where over 1 million dollars was raised for the Make A Wish foundation. 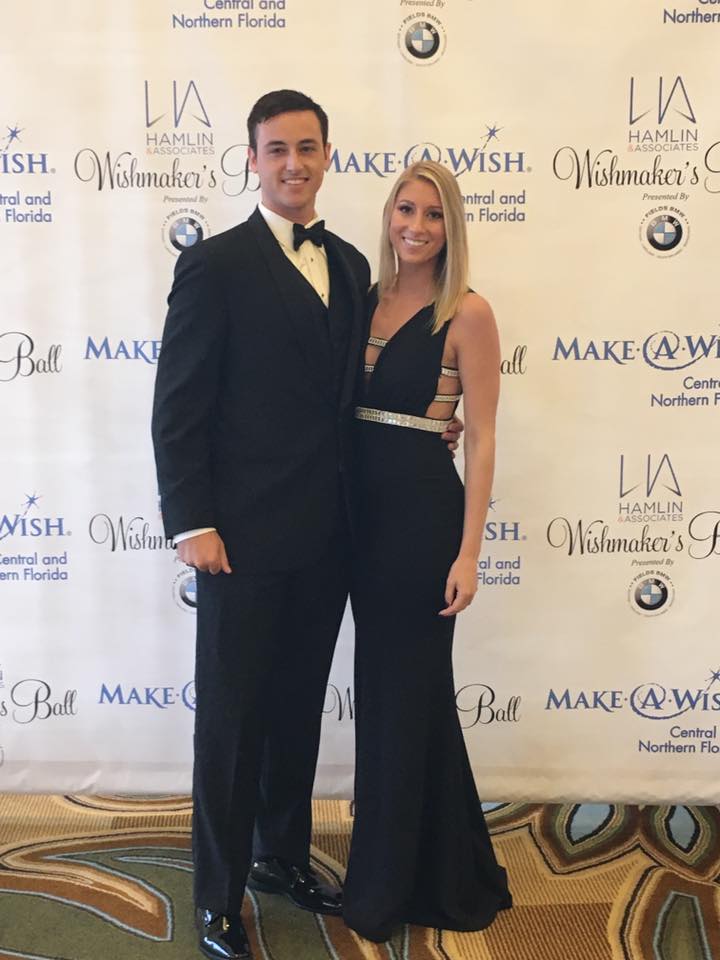 Recently she purchased a gown for the ball and it needed a few alterations. Since she does not have a sewing machine yet, she mailed the dress to me, I completed her alterations and sent it back to her. The gown has a V neckline that needed to be brought up a bit at the shoulders and the length was 1/2 inch to long.
 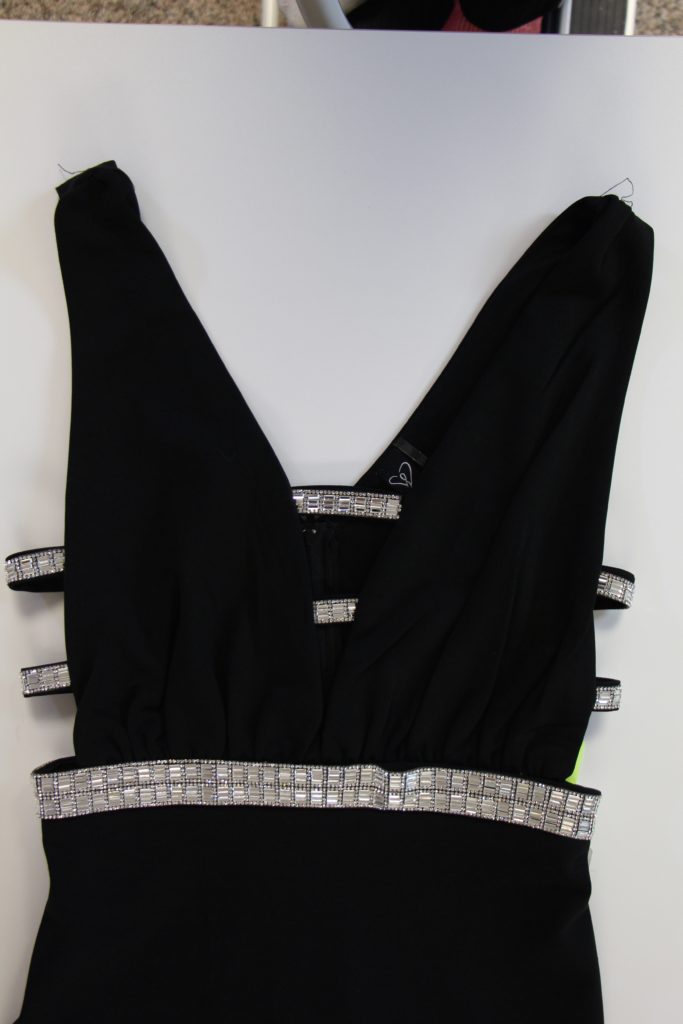 Here in the photo you can see how taking in the shoulder seam will help as I simply machine stitched it.
 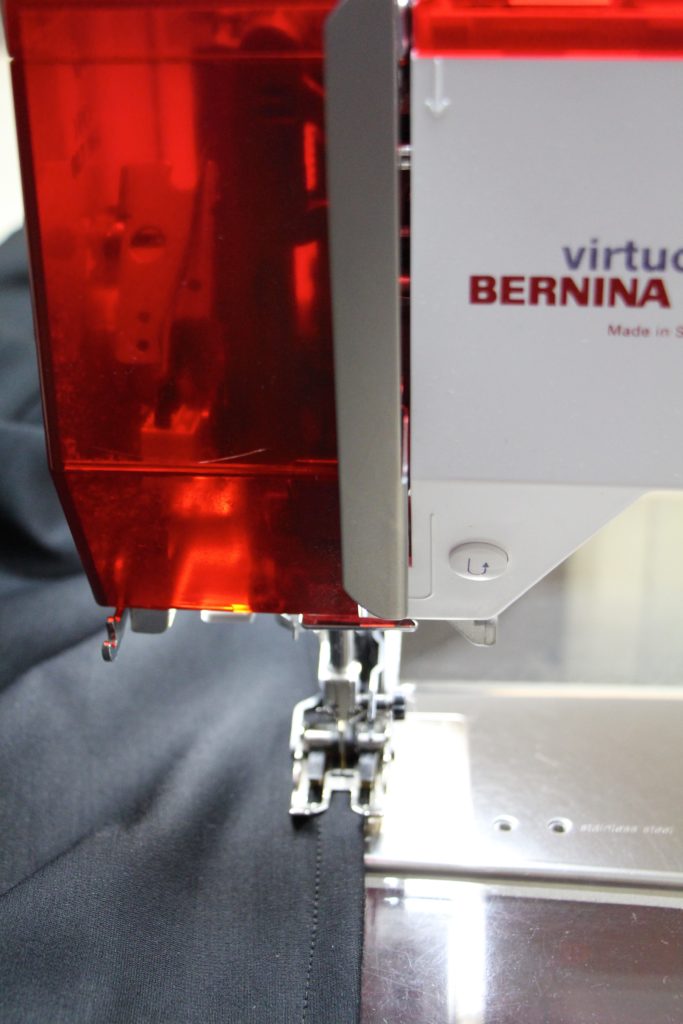 I used my walking foot for this and here you can see I used it for the hemming as well. Remember, the walking foot is not just for quilting! The fabric is a stretchy knit and I knew from past experience I would have success using this foot. It worked beautifully. I was happy to help her out, she and Grant looked wonderful and they had a very nice time supporting the Make A Wish foundation.
 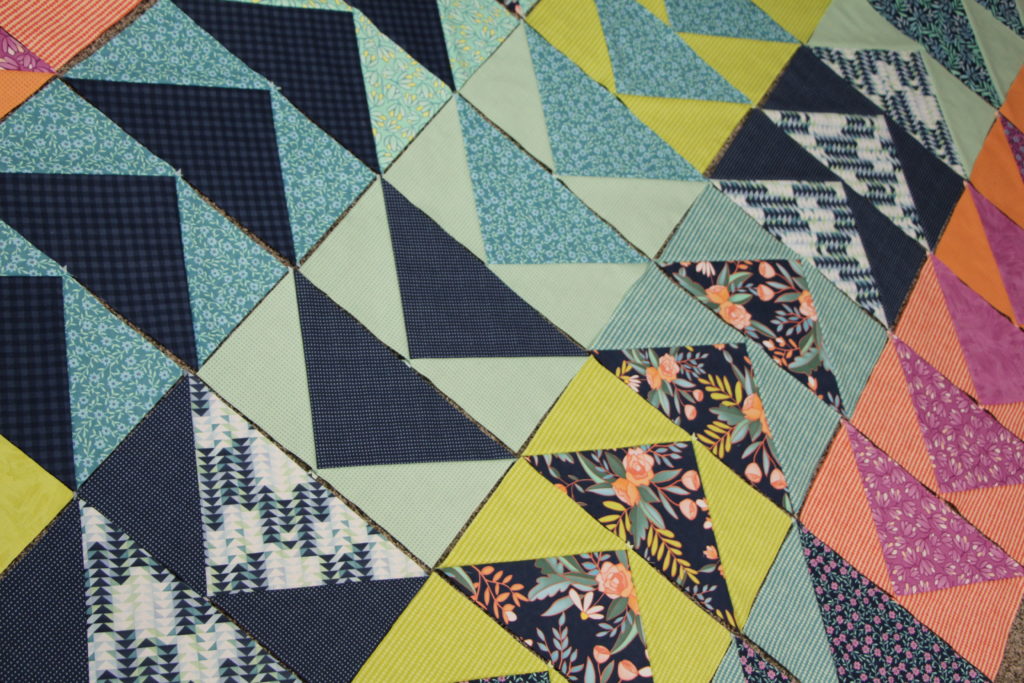 Do you remember this project, it is Noelle’s flying geese quilt she started on Easter break. It was coming along quit nicely until she packed up for a service trip to New Orleans, came home for 2 days and is now in Germany for 3 1/2 weeks. Both of these destinations are through Wartburg College and here she is with the town of Herrnut behind her, I think?
 It is nice for us because we have her daily itinerary and usually are able to video chat via Facebook with her almost everyday, depending on wi-fi connection. Their travels focus on the history of Lutheran Religion. We are happy she has this opportunity. Here is an example of the days itinerary, May 16, 2017, Tuesday: Dresden
We leave Herrnhut and visit Dresden. Upon arrival, visit the Frauenkirche, Church of Our Lady Lutheran, which remained in ruins from the WWII bombing until a recent restoration. Hear about the rebuilding of the church as well as the reconstruction of the entire city. After lunch on your own, leave Dresden and drive south to the nearby Germany-Czech Republic border and continue through the countryside to Prague. 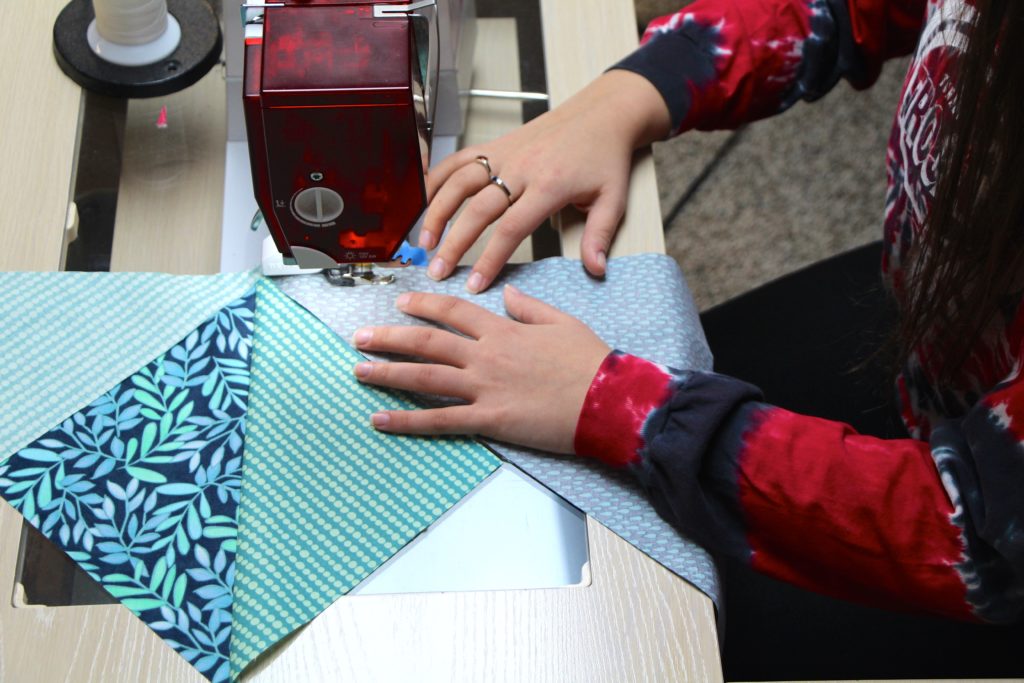 When she returns home she will get settled and then I am sure the quilt will be finished as she is excited to use a new quilt. The blocks are all completed and 2 rows are together. As you recall, this is a quick project that she wanted to complete in a timely manner.
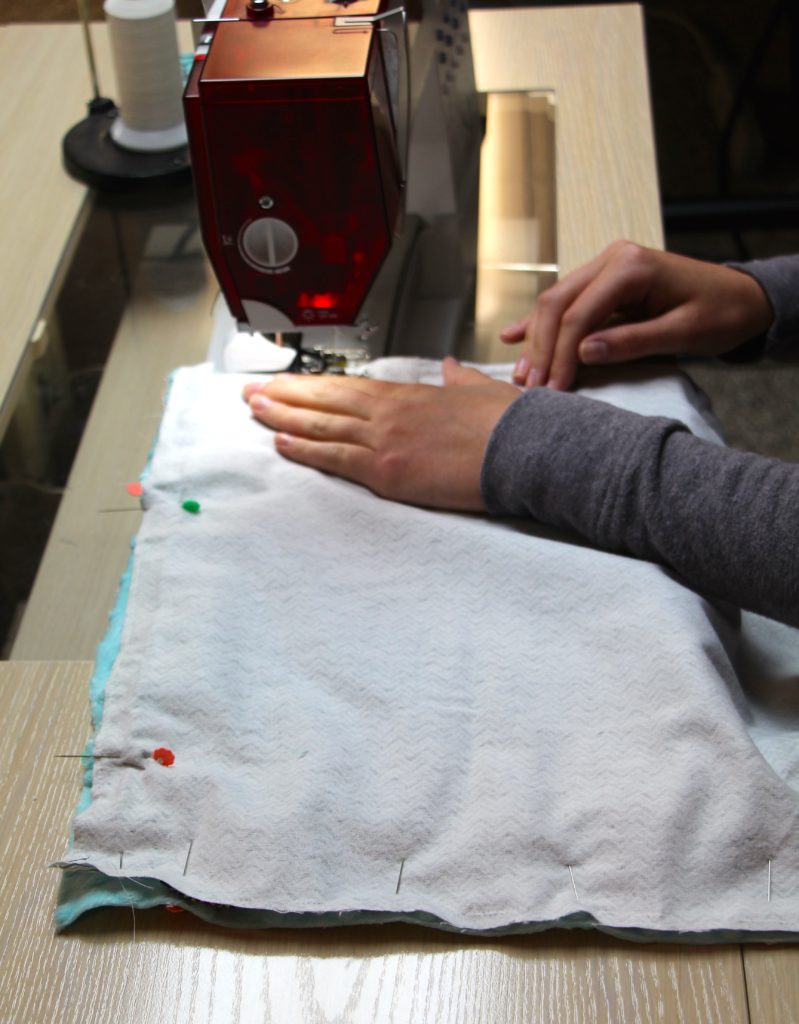 Can you guess what Gene Anne is making? Can you believe it our family has never made one of these. Gene Anne’s Child Health college class required them to make a project for an infant, for example a toy or a book. Well, what do quilter’s do in this situation? They make what they know how to do, something that is fun and based on their past experiences, they know it will turn out.
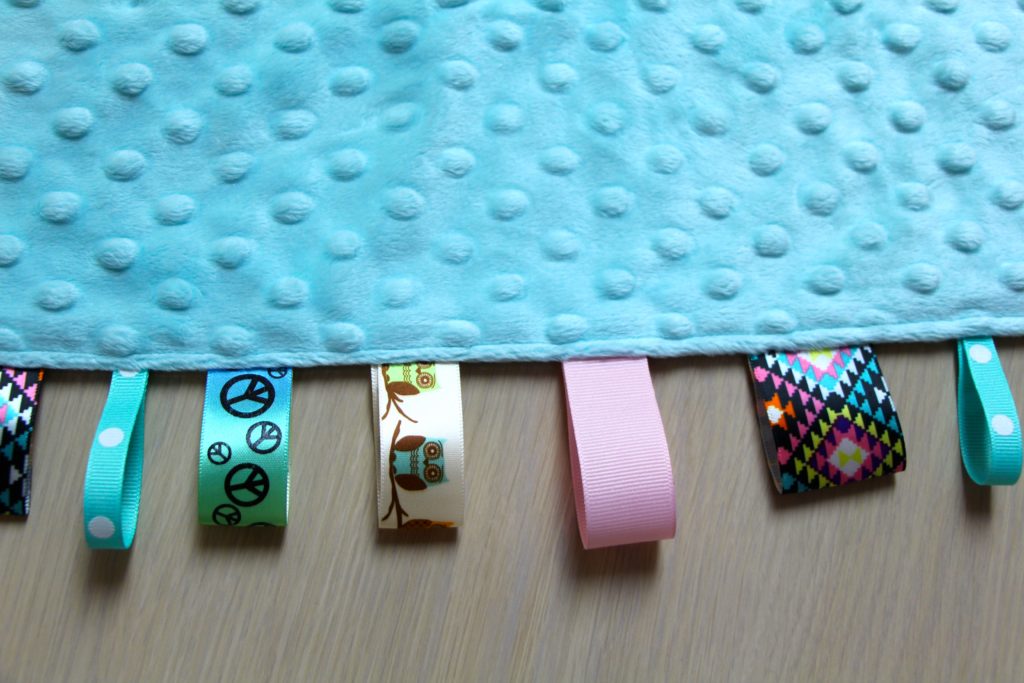 She made a tag blanket because, what quilter doesn’t have extra fabric and we have a drawer with assorted ribbons, so perfect. She used minky on one side and flannel on the other. She was so pleased with how it turned out, and I think she scored 100% on her grade.
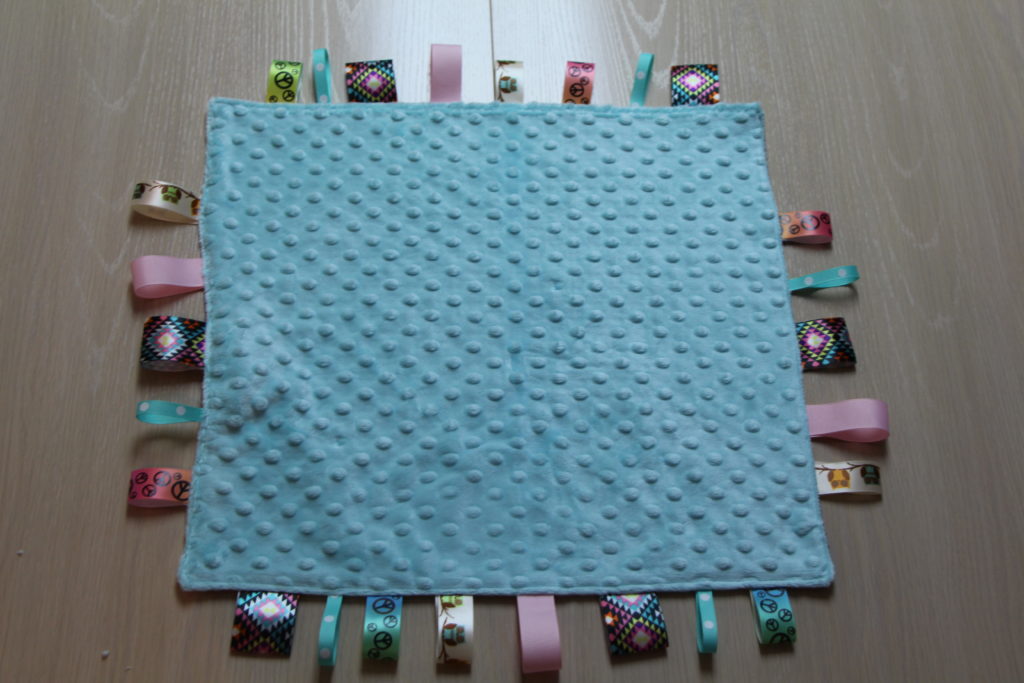 Today I will be completing a customer quilt and she has agreed to a Q and A! She works at a quilt shop and I will introduce you to her in an upcoming blog, I hope she gives us some insider tips! Let me know if there are any specific questions I should ask her and have a Great Day!
